

Discover the realm of advanced nail art – where your nails become a canvas for creative expression, just like fashion and hairstyles.
In recent years, nail art has become a global phenomenon, with people from all walks of life embracing this form of self-expression. Gone are the days of simple, single-color manicures. Today, nail art has evolved into an intricate and mesmerizing art form that pushes boundaries and captivates onlookers.
From delicate floral patterns to bold geometric designs, advanced nail art offers endless possibilities for those who dare to explore. Whether you prefer a classic, elegant look or want to experiment with vibrant colors and textures, there is a design out there that will speak to your unique personality.
But what sets advanced nail art apart from the rest? It’s the attention to detail, the precision, and the skill required to create these stunning designs. It’s about pushing the boundaries of what can be done on such a small canvas and turning nails into miniature masterpieces.
In this series, we will delve into the world of advanced nail art designs, exploring different techniques, trends, and tools that will help you elevate your nail game. We will showcase the work of talented artists and provide step-by-step tutorials for you to try at home. Whether you’re a seasoned nail art enthusiast or a beginner looking to dip your toes (or rather, fingertips) into this creative world, there will be something for everyone.
So, get ready to unleash your creativity and embark on a journey that will take your nails to new heights. Advanced nail art designs await, and the possibilities are endless. Let’s dive in and explore the artistry that lies at your fingertips.
What Are Some Advanced Nail Art Designs?
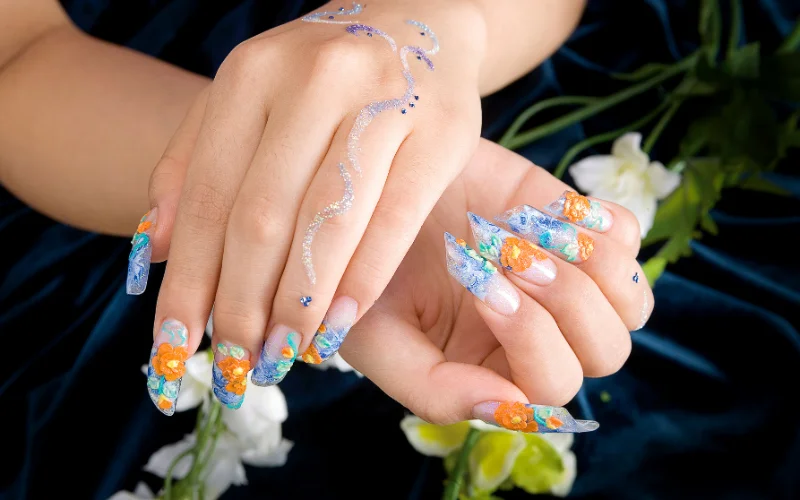
Regarding nail art, there are endless possibilities for creativity and self-expression. Advanced nail art designs take this to the next level, pushing the boundaries of what can be achieved on such a small canvas. From intricate patterns to 3D embellishments, here are some ideas to inspire your next nail art adventure.
One popular advanced nail art design is the ombre effect. This technique involves blending two or more colors seamlessly, creating a gradient effect on the nails. It can be achieved using a sponge or a brush, with endless color combinations. Whether you prefer a subtle transition or a bold contrast, ombre nails will make a statement.
For those who love a bit of sparkle, glitter nails are a must-try. From fine glitters to chunky sequins, there are countless ways to incorporate sparkle into your nail art. You can apply glitter all over the nails, create a glitter accent nail, or even use it to create intricate designs. The options are endless, and the result is always eye-catching.
If you’re feeling adventurous, why not try some 3D nail art? This technique involves adding embellishments like rhinestones, beads, or even small charms to your nails. The result is a stunning, unique design that will turn heads. Just make sure to secure the 3D elements properly to avoid any mishaps.
The negative space manicure is another advanced nail art design gaining popularity. This style involves leaving parts of the nail bare, creating a minimalist and modern look. You can play with different shapes and patterns or combine them with other techniques like ombre or glitter for a truly unique design.
In conclusion, advanced nail art designs offer possibilities for those who love to express themselves through their nails. There is something for everyone, from ombre to glitter, 3D embellishments to negative space. So get creative, and let your nails be your canvas.
How Do I Create a Marble Nail Design?
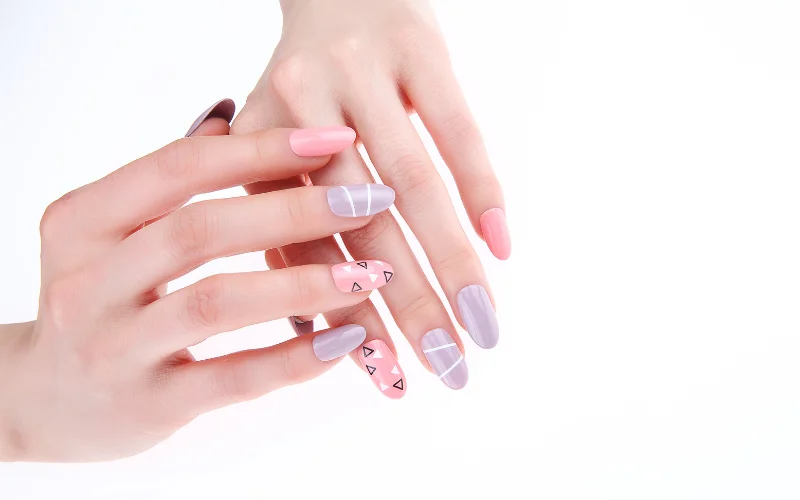
Marble nail designs have become increasingly popular in advanced nail art. The intricate patterns and unique swirls create a stunning, elegant look that will turn heads. If you’re wondering how to achieve this mesmerizing design, read on for a step-by-step guide.
You will need a few essential tools and materials to create a marble nail design. First, gather a base color of your choice and two or three additional nail polish colors that complement each other. You will also need a small cup or container with room-temperature water.
Start by applying a base coat to your nails to protect them and provide a smooth surface. Once the base coat is dry, let it dry completely with your chosen base color. This will serve as the background for your marble design.
Next, drop a few drops of your chosen nail polish colors into the cup of water. Use a toothpick or a thin brush to swirl the colors together gently. Once you’re satisfied with the design, carefully dip your nail into the water, allowing the polish to adhere to your nail. Remove excess polish from the water’s surface before pulling out your finger.
Repeat this process for each nail, creating a unique marble design. Once the polish is dry, apply a top coat to seal in the design and add shine.
Creating a marble nail design may take some practice, but you can achieve beautiful results with patience and the right technique. Experiment with different colors and patterns to create unique marble nail art.
Incorporating marble nail designs into your nail art repertoire will elevate your style and make a fashionable statement. So why not give it a try and create stunning marble nails today?
What Tools Do I Need for Advanced Nail Art?
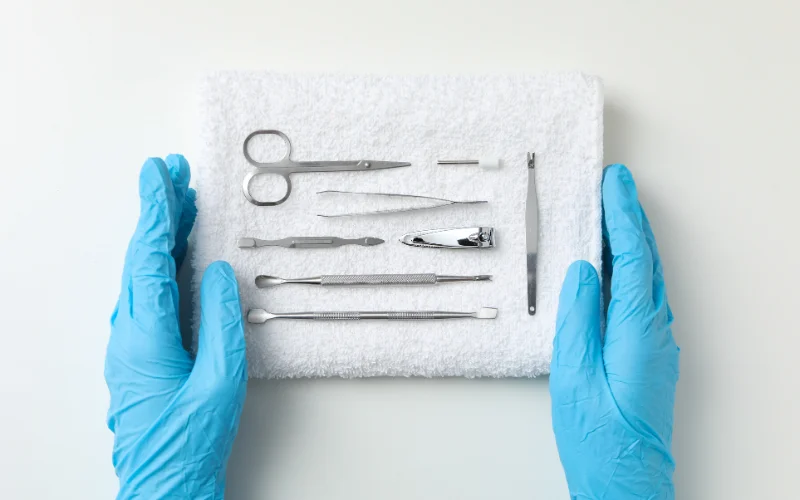
The right tools can make all the difference in advanced nail art designs. Whether you’re a professional nail artist or a DIY enthusiast, having the proper tools will help you achieve stunning and intricate designs. This article will explore the essential tools you need to take your nail art to the next level.
A set of quality brushes is one of the most important tools for advanced nail art. Fine-tipped meetings are essential for creating intricate designs and details. Look for brushes of different sizes and shapes for more design versatility. From thin lines to delicate swirls, having various meetings will allow you to explore other techniques and styles.
Another must-have tool for advanced nail art is a dotting tool. Dotting tools come in various sizes and are perfect for creating dots, flowers, and other small details. They are easy to use and give you precise control over the size and placement of your designs.
If you’re into 3D nail art, a set of nail art molds is essential. These molds allow you to create stunning 3D designs like flowers, bows, and even miniature sculptures. Fill the molds with acrylic or gel and let them dry before attaching them to your nails.
Invest in a good quality nail art glitter to sparkle your designs. Glitters come in various colors and sizes, allowing you to create dazzling effects. Whether you want a subtle shimmer or a bold glittery look, having a variety of glitters in your collection will give you endless possibilities.
Lastly, don’t forget about the basics. A good base coat and top coat are essential for any nail art design. They will help your structure last longer and protect your nails from damage.
In conclusion, the right tools are crucial for creating advanced nail art designs. Investing in quality tools will elevate your nail art game from brushes and dotting tools to molds and glitters. So, gather your tools and let your creativity flow!
How Can I Achieve a Gradient Nail Design?
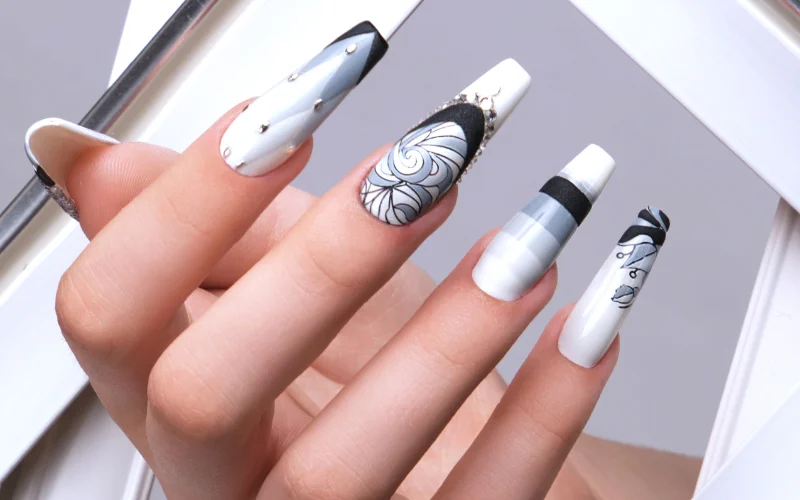
Achieving a stunning gradient nail design is easier than you might think. With a few simple steps and creativity, you can create a beautiful, eye-catching look to make your nails stand out. In this article, we will explore the process of creating a gradient nail design and provide tips and tricks to help you achieve the perfect look.
To start, you will need a few basic supplies. First, choose two or more nail polish colors you want to use for your gradient. It’s best to select colors that blend well together and create a smooth transition. You will also need a makeup sponge, a small brush, and a top coat to seal in your design.
Begin by applying a base coat to your nails to protect them and create a smooth surface. Once the base coat is dry, use your lightest nail polish color on the sponge. Gently dab the sponge onto your nails, starting at the base and moving towards the tip. Repeat this step with your second color, slightly overlapping the first color to create a seamless transition. If you want to add more colors, repeat the process until you achieve the desired effect.
After applying the colors, use a small brush dipped in nail polish remover to clean up any excess polish around your nails. This will help create a clean and professional finish. Finally, apply a top coat to seal your design and give your nails a glossy finish.
You can create endless variations of gradient nail designs with a little practice and experimentation. Don’t be afraid to mix and match colors or try different techniques. The key is to have fun and let your creativity shine through.
In conclusion, achieving a gradient nail design is a fun and creative way to elevate your nail art game. By following these simple steps and experimenting with different colors and techniques, you can create a unique, eye-catching look that impresses you. So go ahead, grab your supplies, and start creating your own stunning gradient nail designs today!
What Are Some Advanced Nail Stamping Techniques?
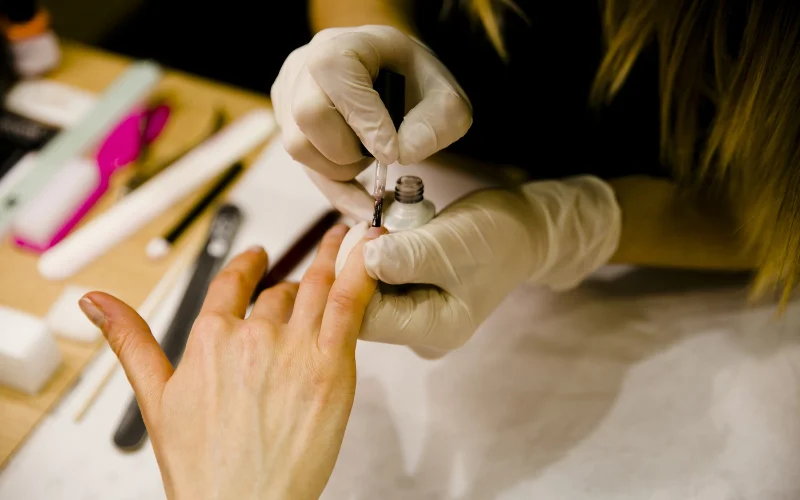
Advanced nail stamping techniques take nail art to the next level, allowing you to create intricate and eye-catching designs on your nails. These techniques require a bit of practice, but with time and patience, you can master them and create stunning nail art designs.
One advanced technique is reverse stamping. This technique involves stamping a design onto a stamper, filling in the design with different nail polish colors, and then transferring the design onto your nails. This allows you to create multi-colored and detailed designs that will impress you.
Another technique is double stamping. With this technique, you stamp one design onto your nails and then another structure. This creates a layered effect and adds depth to your nail art. You can experiment with different colors and designs to create unique and visually appealing nail art.
Gradient stamping is another advanced technique that creates a beautiful ombre effect on your nails. To achieve this, apply different nail polish colors to the stamping plate in a gradient pattern and then transfer it onto your nails. This technique adds a touch of elegance and sophistication to your nail art.
Advanced nail stamping techniques include combining stamping with other nail art techniques, such as water marbling or hand painting. These combinations allow you to create intricate, unique designs to make your nails stand out.
In conclusion, advanced nail stamping techniques open possibilities for creating stunning and unique nail art designs. With practice and experimentation, you can master these techniques and take your nail art to new heights. So, grab your stamping plates and nail polishes, and get creative with these advanced techniques!
How Do I Create a 3D Nail Design?
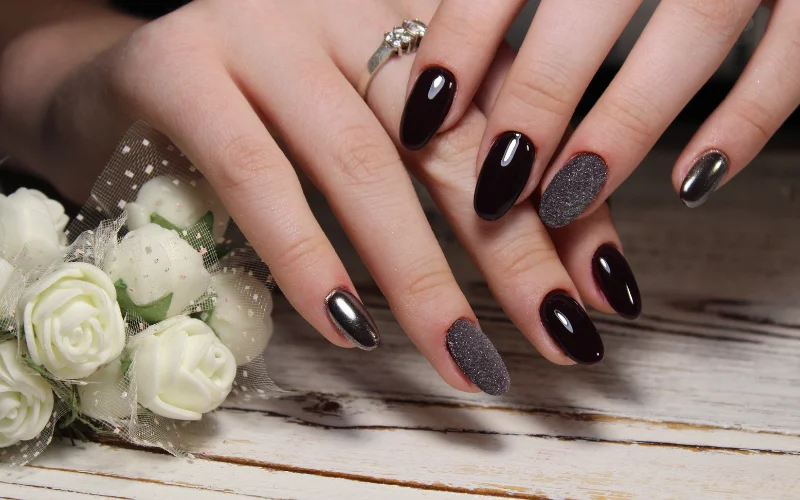
Creating a 3D nail design is a popular trend in advanced nail art designs. It allows you to add dimension and texture to your nails, making them stand out. If you’re wondering how to achieve this stunning look, read for some tips and tricks.
One of the first steps in creating a 3D nail design is to choose the right materials. You’ll need various nail art supplies, such as acrylic powder, nail glue, and a brush. Additionally, you’ll want to have some 3D nail art decorations on hand, such as beads, rhinestones, or small charms.
To begin, start by applying a base coat to your nails. This will create a smooth surface for your design. Once the base coat is dry, add the 3D elements. Mix a small acrylic powder with nail glue to create a paste-like consistency. Use a brush to apply this mixture to your nails, shaping it into the desired design. You can make flowers, bows, or any other shape you want.
Once you’ve applied the acrylic mixture, it’s time to add the 3D decorations. Use tweezers or a toothpick to carefully place the beads, rhinestones, or charms onto the wet acrylic. Press them gently to secure them in place. You can create intricate designs by layering elements or mixing and matching colors.
After adding the decorations, allow your nails to dry completely. Once dry, apply a top coat to seal your design and add shine. This will also help to ensure that your 3D elements stay in place.
Creating a 3D nail design may take some practice, but you can achieve stunning results with time and patience. Experiment with different shapes, colors, and textures to create unique, eye-catching designs. So go ahead and unleash your creativity and transform your nails into miniature works of art!
What Are Some Advanced Nail Art Techniques Using Foils?
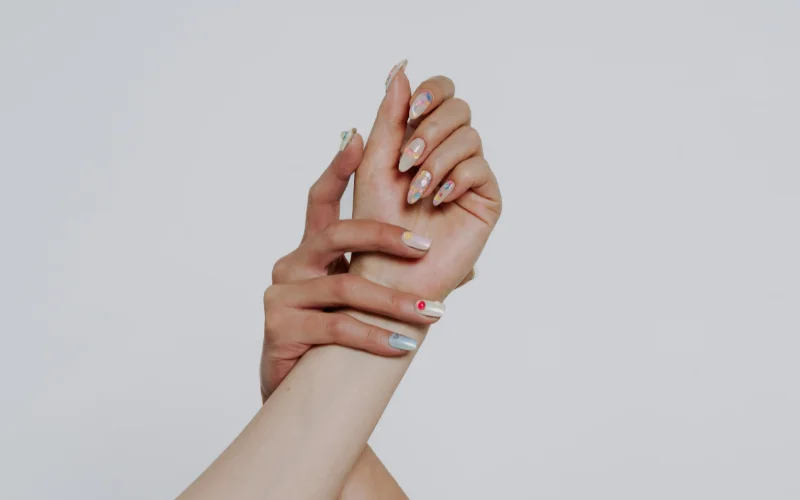
Advanced nail art designs have become increasingly popular in recent years, with nail enthusiasts constantly seeking new and innovative ways to express their creativity. One technique that has gained significant attention is the use of foils. Foils can add a touch of glamour and sophistication to any nail design, and the possibilities are endless. In this article, we will explore some advanced nail art techniques using foils that will surely inspire you to take your nail game to the next level.
One of the most popular tech foil techniques is the “foil transfer” method. This involves applying a special adhesive to the nail, making it tacky. Once the bond reaches the desired level of stickiness, a foil sheet is gently pressed onto the pin and then away, revealing a stunning metallic design. This technique allows for intricate patterns and procedures that are impossible with regular nail polish alone.
Another technique that is gaining popularity is the “foil stamping” method. This involves using a stamping plate with a design of your choice and a foil polish. The foil polish is applied to the plan on the stamping plate, and a stamper transfers the design onto the nail. The result is a beautifully detailed design that will make your nails stand out. For those who prefer a more subtle look, the “foil gradient” technique is perfect. This involves applying different foil shades onto the nail, creating a gradient effect. The foils can be cut into various shapes and sizes to create a unique, eye-catching sign design. This versatile technique can be customized to suit any occasion or personal style.
In conclusion, foils are a fantastic way to elevate your nail art designs to the next level. The results will impress if you use the foil transfer, stamping, or orient technique. So why not give advanced nail art techniques to let your creativity shine?
How Can I Create a Watercolor Nail Design?
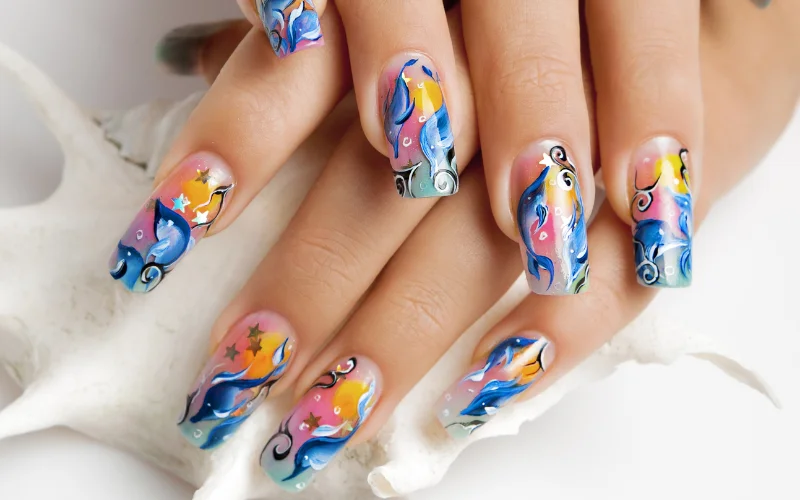
Watercolor nail designs are popular for those who want to add a unique and artistic touch to their manicure. This technique allows you to create beautiful and vibrant designs that resemble the delicate strokes of a watercolor painting. This article will explore the steps and techniques required to complete your watercolor nail design.
To begin, gather all the necessary materials. You will need a base coat, red nail polish colors, a thin brush or sponge, a small water dish, and a top coat. Start by applying a base coat to protect your nails and create a smooth surface.
Next, choose your desired colors for the watercolor effect. It is best to select colors that blend well together. Apply a few drops of each color onto a palette or a small dishwater dishinDiphin brush or sponge, dio the first color, and lightly dab it onto your nails. Please repeat this step with the other colors, blending them on the pin to create a watercolor effect.
To add more depth and dimension to your design, you can layer different colors on top of each other. This will create a more vibrant and textured look. RemCleanur brush or sponge between each color to avoid muddying the shades.
Once satisfied with the watercolor effect, allow your nails to dry completely. Finish off with a top coat to seal the design and add shine.
Creating a watercolor nail design may take some practice, but you can achieve stunning results with time and patience. Experiment with different color combinations and techniques to develop your unique plans. With this artistic approach to nail art, you can showcase your creativity and stand out from the crowd.
Remember always to have fun and enjoy the process of creating your watercolor nail designs. The possibilities are endless, and you can let your imagination run wild. So grab your brushes and paints, and start creating beautiful watercolor nail art today!
Marble nail designs have become increasingly popular in recent years, offering a unique and mesmerizing pattern that can be achieved through various techniques. You can create stunning marble effects by experimenting with different colors and tools.
To create advanced nail art designs, having the right tools is essential. From dotting tools and striping brushes to nail stamping kits and nail foils, investing in quality tools will greatly enhance your nail art creations.
Achieving a gradient nail design requires patience and precision. Blending multiple shades of polish, you can create a seamless transition of colors on your nails. Practice and experimentation will help you perfect this technique.
Nail stamping techniques allow for intricate and detailed designs that are otherwise challenging to achieve freehand. With the right stamping plates and stamping polish, you can effortlessly transfer intricate patterns onto your nails, creating professional-looking designs.
For those looking to take their nail art to the next level, 3D nail designs offer a three-dimensional effect that adds depth and dimension to your nails. The possibilities are endless, with embellishments and charms to acrylic powders and gel extensions; nail art techniques using foils provide a metallic and reflective finish that instantly elevates your nail designs. You can create eye-catching and luxurious designs by applying foil adhesive and carefully transferring the foil onto your nails; watercolor nail designs offer a soft and ethereal look that mimics the delicate strokes of a watercolor painting. By blending different shades of polish and using a watercolor brush, you can create beautiful and artistic designs on your nails.
Staying updated with the latest trends and developments is important as nail art evolves. New techniques, tools, and products are constantly emerging, offering even more possibilities for advanced nail art designs.
Thank you for taking the time to read this post. We hope you found it informative and inspiring. We encourage you to leave any comments or feedback, as we value your input. Stay creative and experiment with advanced nail art designs to showcase your unique style.
Conclusion
In conclusion, advanced nail art designs offer many possibilities to express creativity and individuality. Throughout this post, we have explored various topics related to advanced nail art designs, including marble nail designs, gradient nail designs, nail stamping techniques, 3D nail designs, nail art techniques using foils, and watercolor nail designs.

