

Discover your creativity with Step-by-step Nail Art Guides! Whether a nail art pro or a newbie, we’re your go-to for unique designs and easy tutorials.
With our comprehensive guides, you’ll learn how to create stunning nail designs at home. From simple and elegant patterns to intricate and bold designs, our step-by-step instructions will walk you through each technique, ensuring you achieve professional-looking results every time.
But why stop at just one design? With our guides, you’ll have endless possibilities at your fingertips. Experiment with different colors, textures, and embellishments to create unique nail art masterpieces. Let your imagination run wild and express your style through your nails.
Not only will our guides help you unleash your creativity, but they will also provide you with valuable tips and tricks to ensure long-lasting and flawless nail art. From proper nail preparation to choosing the right tools and products, we’ve got all the insider knowledge you need to achieve salon-quality nails in your home.
Whether you’re looking to impress at a special event or want to add a touch of glamour to your everyday look, Step-by-step Nail Art Guides has got you covered. Join us on this exciting journey as we dive into the world of nail art and discover the endless possibilities that await.
So, grab your nail polish and brushes, and get ready to transform your nails into works of art. Stay tuned for our upcoming articles, where we’ll delve deeper into various nail art techniques, inspire different occasions, and share expert tips and tricks to take your nail art game to the next level. Let’s get started on this nail art adventure together!
What Are the Essential Tools for Nail Art?
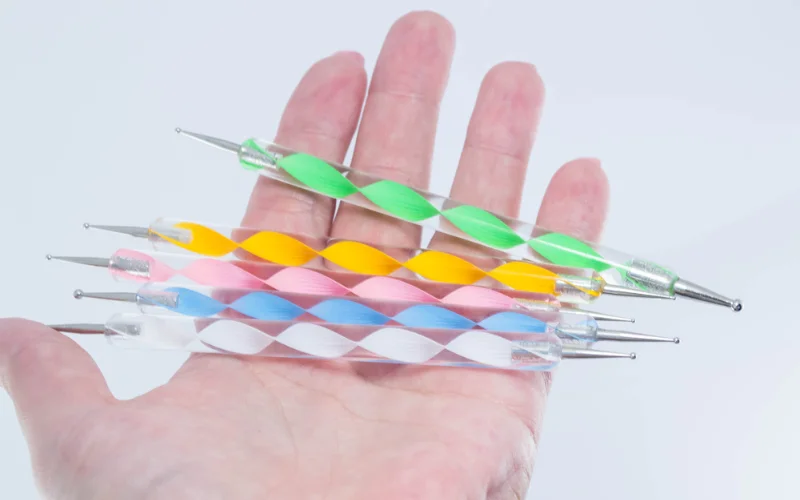
Nail art has become increasingly popular recently, with people embracing creativity and self-expression through their nails. A beginner or an experienced nail artist must have the right tools to achieve stunning nail art designs. In this article, we will explore the must-have tools for nail art that will help you create beautiful and intricate designs.
Good quality nail polish is one of the most important tools for nail art. Look for polishes with various colors and finishes, such as matte, shimmer, and glitter. Having a variety of classes allows you to experiment and create different looks. Additionally, invest in a good top coat and base coat to ensure your nail art lasts longer and remains chip-free.
Next, you’ll need a set of nail brushes. These brushes come in various sizes and shapes, allowing you to create different patterns and designs. A thin brush is perfect for creating intricate details, while a flat brush is great for larger structures. Additionally, a dotting tool is essential for making dots and small pieces.
You’ll also need a set of nail stencils or vinyl to achieve professional-looking nail art. These stencils make creating geometric patterns, stripes, and other intricate designs easy. They are especially useful for beginners who may not have steady hands.
Another essential tool is a nail file and buffer. These tools help shape and smooth the nails, ensuring a perfect canvas for your nail art. A cuticle pusher is also handy for pushing back the cuticles and creating a clean nail bed.
Lastly, don’t forget nail decorations such as rhinestones, studs, and glitter. These embellishments add an extra touch of glamour to your nail art designs.
In conclusion, having the right tools is crucial for creating stunning nail art. From a wide range of nail polishes to brushes, stencils, and decorations, investing in these essentials will take your nail art to the next level. So gather your tools and let your creativity run wild!
How to Create a Simple Polka Dot Design
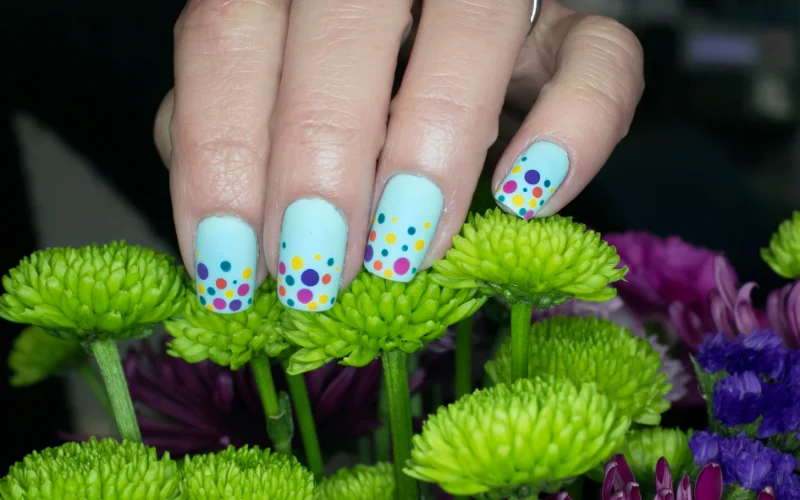
Polka dot nail art designs are a fun and easy way to add color and playfulness to your nails. Whether a beginner or a seasoned nail artist, creating a simple polka dot design is a great way to showcase creativity. In this step-by-step guide, we’ll walk you through creating a stunning polka-dot design that will make your nails stand out.
To start, gather all the necessary supplies. You’ll need a base coat, a nail polish color, a dotting tool or a toothpick, and a top coat. Once you have everything ready, follow these steps:
1. Begin by applying a base coat to protect your nails and ensure a smooth application of the nail polish.
2. Once the base coat is dry, apply your nail polish as the base color. Let it dry completely before moving on to the next step.
3. Now, it’s time to create the polka dots. Dip the dotting tool or toothpick into a contrasting nail polish color and gently press it onto your nails to create bubbles. You can create different sizes and patterns by varying the pressure and spacing between the dots.
4. Continue adding dots until you’re satisfied with the design. Depending on your preference, you can create a scattered pattern or a more organized layout.
5. Once the dots are dry, apply a top coat to seal in the design and add a glossy finish. This will also help your nail art last longer.
And there you have it! A simple polka dot nail art design that is easy to create and looks stunning. Experiment with different colors and patterns to create unique designs that reflect your style. Have fun, and let your creativity shine through your nails!
Remember, practice makes perfect, so don’t be discouraged if your first attempt doesn’t turn out exactly as you envisioned. Keep trying, and soon you’ll create intricate nail art designs like a pro. Happy nail art-ing!
How to Do a Gradient Nail Art Design
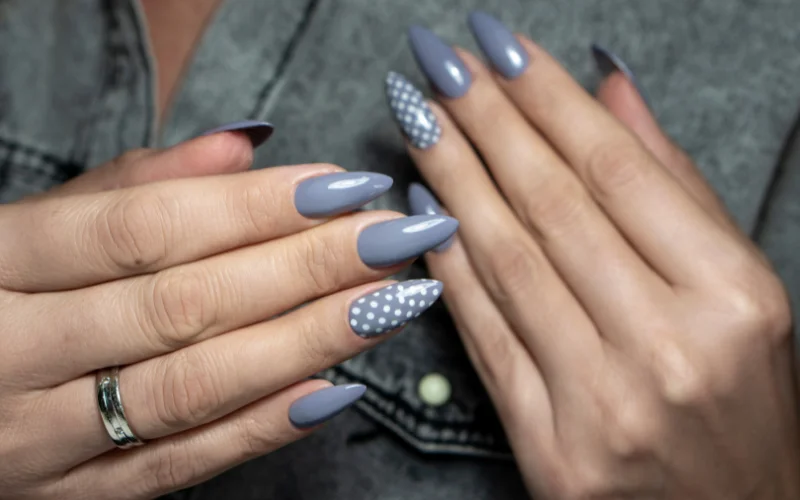
Creating a stunning gradient nail art design is easier than you think. You can achieve a beautiful ombre effect on your nails with just a few simple steps. Follow this step-by-step guide to learn how to create a gradient nail art design that will make your nails stand out.
Start by gathering all the necessary supplies. You will need at least two nail polish colors that blend well together, a makeup sponge, a top coat, and a base coat. Make sure your nails are clean and trimmed before you begin.
Apply a base coat to protect your nails and ensure the nail polish adheres well. Once the base coat is dry, apply a thin layer of the lighter nail polish color to your nails. Let it dry completely before moving on to the next step.
Take your makeup sponge and apply a small amount of the two nail polish colors side by side. Press the sponge onto your nails, starting at the base and working toward the tip. Repeat this step until you achieve the desired gradient effect.
Once the nail polish is dry, apply a top coat to seal in the design and add shine. Clean up any excess polish around your nails using a brush dipped in nail polish remover.
And there you have it! A stunning gradient nail art design that is sure to turn heads. Experiment with different color combinations and techniques to create unique and personalized designs. With a little practice, you’ll be able to master the art of gradient nails in no time.
Remember always to take your time and be patient. Nail art is about creativity and self-expression, so have fun!
What Are Some Easy Nail Art Ideas for Beginners?
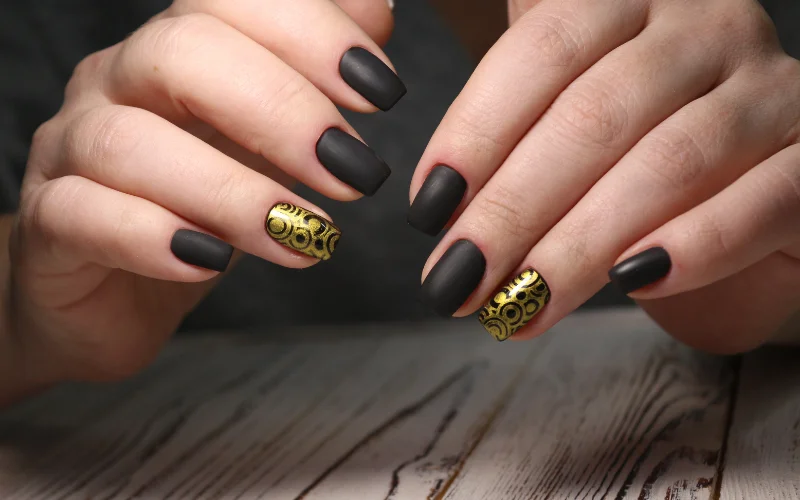
Are lAre you Looking to try nail art but unsure where to start? Don’t worry; we’ve got you covered! This article will explore some easy nail art ideas that are perfect for beginners. Whether you’re a complete novice or just looking for inspiration, these ideas will help you create stunning nail designs quickly.
The classic French manicure is one of the simplest nail art ideas for beginners. This timeless look involves painting the tips of your nails white and the rest of the nail bed with a sheer or nude color. It’s elegant, chic, and perfect for any occasion. To add a modern twist, you can experiment with different colors for the tips or even add some glitter for a touch of sparkle.
Another easy nail art idea is the polka dot design. All you need is a dotting tool, a toothpick, and some nail polish. Dip the device into the polish and create dots on your nails in any pattern you like. You can go for a monochromatic look or mix and match different colors for a fun and playful design.
If you’re feeling a bit more adventurous, you can try your hand at some geometric nail art. This involves using tape or stickers to create clean lines and shapes on your nails. The possibilities are endless, whether it’s triangles, squares, or chevron patterns. Let each layer of polish dry before applying the tape to avoid smudging.
A simple ombre design is the way to go for those who prefer a more natural look. Start with a light shade at the base of your nails and gradually blend it into a darker shade towards the tips. You can use a sponge or a brush to create the gradient effect. It’s subtle, elegant, and perfect for everyday wear.
In conclusion, these easy nail art ideas are perfect for beginners who want to try their hand at creating beautiful designs. Whether you prefer a classic French manicure, polka dots, geometric patterns, or ombre, there’s something for everyone. So grab your nail polish and get creative!
How to Create a Floral Nail Art Design
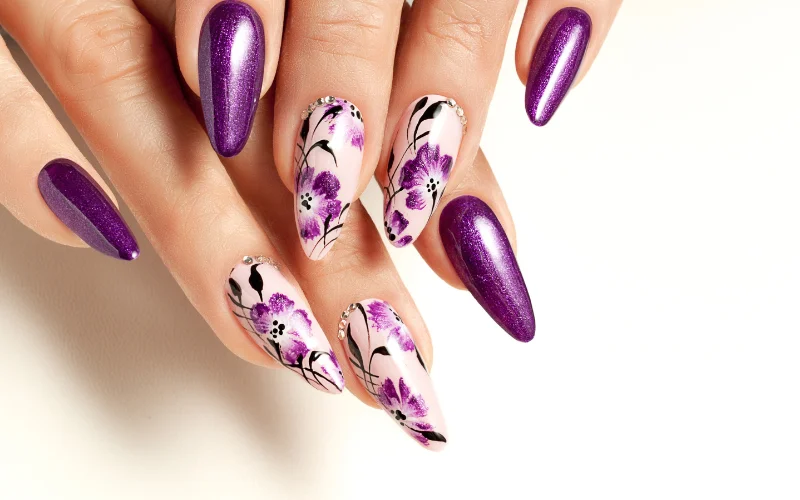
If you want to add a touch of elegance and femininity to your nails, a floral nail art design is the perfect choice. This design will make your nails stand out with its delicate and intricate details. This step-by-step guide will show you how to create a stunning floral nail art design that will impress everyone.
To start, you will need a few supplies. Gather a base coat, white nail polish, a thin nail art brush, and a selection of nail polish colors for the flowers. Choosing colors that complement each other and create a cohesive look is best.
Begin by applying a base coat to protect your nails and allow for a smooth application of the nail polish. Once the base coat is dry, apply two coats of white nail polish. This will serve as the base for your floral design.
Next, dip the thin nail art brush into one of the colored nail polishes and create small dots on your nails. These dots will serve as the centers of your flowers. You can make as many flowers as you like evenly across your nails.
Once the centers of the flowers are dry, it’s time to add the petals. Dip the nail art brush into another color and create small strokes around the center dots. These strokes should resemble petals and can be varied in size and shape to create a more realistic look.
Continue adding petals to each flower until you are satisfied with the design. You can use different colors for each flower or stick to a monochromatic look – the choice is yours.
Finally, apply a top coat to seal your design and add shine. This will also help your nail art last longer and prevent chipping.
There you have it – a beautiful floral nail art design that will turn heads. You can create stunning nail art designs that showcase your style with a little practice and creativity. So grab your supplies and get ready to show off your artistic side with this floral nail art design!
How to Do a Geometric Nail Art Design
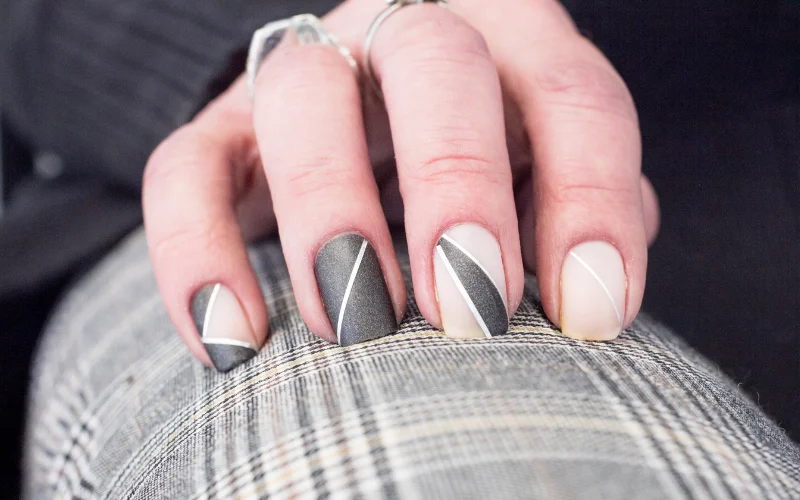
Are you looking to add a touch of creativity to your nails? Why not try a geometric nail art design? Geometric patterns are trendy and give your nails a modern and stylish look. This step-by-step guide will show you how to create a stunning geometric nail art design.
First, gather all the necessary supplies. You will need a base coat, two or more nail polish colors, striping tape, a small brush, and a top coat. Once you have everything ready, follow these steps:
Step 1: Apply a base coat to protect your nails and make the polish last longer.
Step 2: Once the base coat is dry, apply a solid color as your base. This will serve as the background for your geometric design. Let it dry completely.
Step 3: Now, it’s time to create the geometric pattern. Use striping tape to create straight lines or triangles on your nails. Be creative and experiment with different shapes and angles.
Step 4: Once you’re happy with the tape placement, apply a contrasting color over the tape. Make sure to cover the entire nail. Let it dry for a few minutes.
Step 5: Carefully remove the striping tape to reveal the geometric design underneath. Use a small brush and nail polish remover to clean up any mistakes or smudges.
Step 6: Finally, apply a top coat to seal in your design and add shine.
And there you have it! A stunning geometric nail art design that is sure to turn heads. Experiment with different colors and patterns to create your unique look. You’ll become a pro at creating geometric nail art designs with a little practice. So show off your artistic side with this trendy and eye-catching design.
Remember, practice makes perfect, so don’t be discouraged if your first attempt isn’t excellent. Keep trying and have fun with it!
What Are Some Nail Art Designs for Short Nails?
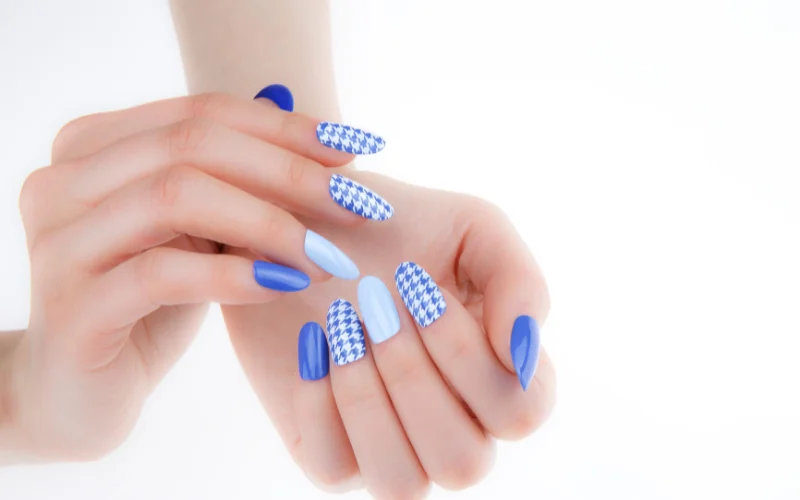
Having short nails doesn’t mean you have to miss out on all the fun when it comes to nail art. Plenty of creative and stylish designs work perfectly on shorter nails. Whether you prefer bold and colorful patterns or something more subtle and elegant, a nail art design is out there for you.
One popular option for short nails is the minimalist look. This style focuses on simplicity and clean lines, making it perfect for those who want a chic and understated look. You can try a single color with a glossy finish or experiment with negative space by leaving parts of your nails bare.
If you want something more playful, why not try a geometric design? Creating triangles or squares using different nail polish colors can be as simple as creating triangles or squares. You can also experiment with different shapes and sizes to create a unique, eye-catching look.
For those who love a touch of glamour, glitter nails are always a great choice. You can opt for a full glitter manicure or add some sparkle to specific areas of your nails. Glitter gradients, where the glitter fades from the base of the nail to the tip, are also a popular option.
Another trendy design for short nails is the accent nail. This involves painting all your nails one color and adding a different design or color to one pin. This can be a great way to experiment with different patterns and colors without overwhelming your nails.
In conclusion, short nails don’t have to limit your nail art options. From minimalist designs to bold and glittery looks, plenty of creative and stylish designs exist to try. So experiment with different patterns, colors, and techniques to find the perfect nail art design for your short nails.
How to Create a Striped Nail Art Design
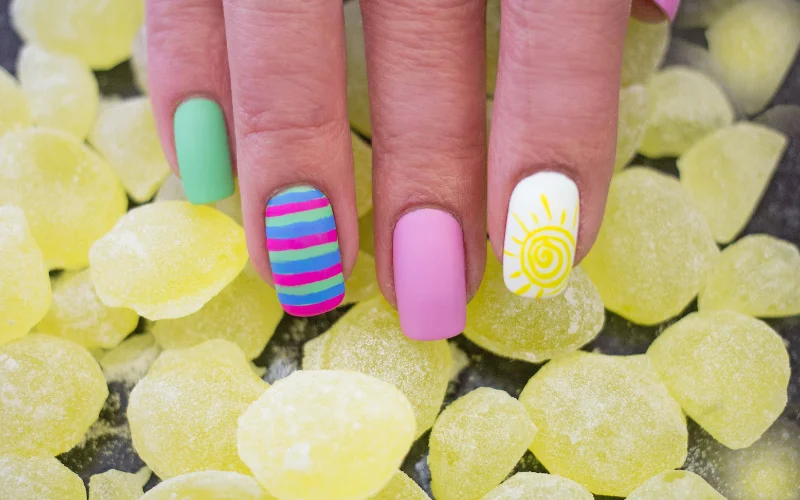
Striped nail art designs are a fun and trendy way to add flair to your nails. Whether you’re looking for a simple and chic design or something more bold and eye-catching, creating striped nail art is easier than you might think. This step-by-step guide shows you how to achieve the perfect striped nail art design.
First, gather all the necessary supplies. You will need a base coat, two or more nail polish colors, striping tape or nail art brushes, and a top coat. Make sure your nails are clean and dry before you begin.
Start by applying a base coat to protect your nails and help the polish last longer. Once the base coat is dry, please choose the color you want for your stripes and apply it to your nails. Let this color dry completely before moving on.
Next, take your striping tape or nail art brush and create stripes on your nails. You can go for vertical, horizontal, or diagonal lines depending on your preference. Make sure to press the tape down firmly to avoid any bleeding of colors.
Once the stripes are in place, carefully remove the striping tape to reveal your beautiful striped design. If you use a nail art brush, clean it before moving on to the next color.
Repeat the process with different colors until you achieve the desired look. You can create as many or as few stripes as you like and experiment with varying combinations of color for a unique design.
Finally, apply a top coat to seal your design and add shine. This will help your nail art last longer and prevent chipping.
And there you have it – a stunning striped nail art design that will turn heads. You can create endless variations of striped nail art with a little practice and creativity. So go ahead, grab your supplies, and let your imagination run wild!
One of the key takeaways from this post is the importance of having the right tools for nail art. From nail brushes to dotting tools, having a well-stocked nail art kit is essential for creating professional-looking designs. We have also discussed how to create a simple polka dot design, a gradient nail art design, a floral design, a geometric design, a striped design, and even designs specifically for short nails.
For beginners, we have provided easy nail art ideas that require minimal skill and can be achieved with basic tools. These ideas serve as a great starting point for those new to nail art, allowing them to experiment and build their confidence.
Looking ahead, we can expect to see new trends and developments in nail art. As technology advances, we may see the introduction of innovative tools and techniques that make nail art even more accessible and creative. Additionally, the nail art community constantly evolves, with new designs and inspirations emerging regularly.
Conclusion
In conclusion, “Step-by-step Nail Art Guides” provide valuable insights and instructions for creating stunning nail art designs. Throughout this post, we have covered various topics related to nail art, including essential tools, simple techniques for beginners, and more intricate designs for those looking to challenge themselves.

