

Are you tired of plain, boring nails? Do you want to express your creativity and make a statement with your fingertips? Look no further than the world of nail art techniques. From stamping to water marbling, Gel to dotting, there are endless possibilities to transform your nails into miniature works of art.
Nail art has become a popular trend in recent years, with people embracing the opportunity to showcase their individuality and style. Whether you’re a beginner or a seasoned pro, there is something for everyone in nail art techniques.
Stamping is one of the most versatile techniques, allowing you to create intricate designs easily. You can transfer intricate patterns onto your nails using special stamping plates and a stamping tool, giving them a unique and eye-catching look.
On the other hand, water marbling involves creating beautiful swirls and patterns by dropping nail polish onto the water and then dipping your nails into the design. The result is a mesmerizing and abstract effect that will turn heads.
Gel nail art is the way to go if you prefer a more long-lasting option. Gel polish is applied to the nails and cured under a UV or LED lamp, creating a durable and glossy finish. You can experiment with different colors, textures, and even 3D designs with gel nail art.
Dotting is another technique that allows you to unleash your creativity. Using a dotting tool or a toothpick, you can create intricate designs using dots of different sizes and colors. From simple polka dots to complex patterns, the possibilities are endless.
This article will delve deeper into these nail art techniques, exploring tips and tricks, design inspiration, and step-by-step tutorials. Whether you’re a nail art enthusiast or just starting, get ready to dive into the world of nail art techniques and let your creativity shine.
Stamping
Stamping is a popular nail art technique that allows you to create intricate designs on your nails using special stamping plates and a stamping tool. This technique is perfect for those who want to achieve professional-looking nail art without the hassle of freehand painting.
To start stamping, you will need a few key tools: stamping plates, a stamping tool, and stamping polish. Stamping plates are metal plates with various designs etched into them. The designs can range from simple geometric shapes to intricate floral patterns. The stamping tool transfers the design from the plate onto your nails, and the stamping polish is specially formulated to work with the stamping process.
First, apply a base coat to your nails and let them dry completely. Then, choose a design from the stamping plate and apply a thin layer of stamping polish over it. Use the stamping tool to pick up the plan and transfer it onto your nails in a rolling motion. Press gently but firmly to ensure that the design transfers completely.
Once the design is transferred, you can add details using nail polish, glitter, or rhinestones. Finish off with a top coat to seal your design and add shine.
Stamping allows for endless creativity and experimentation. You can mix and match designs, colors, and techniques to create unique nail art looks. Whether you’re a beginner or an experienced nail artist, stamping is a technique that anyone can master with practice.
In conclusion, stamping is a versatile and fun nail art technique that allows you to create stunning designs on your nails. You can quickly achieve professional-looking nail art with the right tools and a little practice. So why not try stamping and take your nail art to the next level?
Water Marbling
Water marbling is a popular nail art technique that allows you to create unique and beautiful nail designs. It involves creating patterns by dropping different colored nail polish onto the water and mixing the colors to create a marbled effect. This technique is not only fun to do, but it also produces stunning results that are sure to impress.
You will need a few essential supplies to create a water-marble design. These include a small container filled with room temperature water, nail polish in various colors, a toothpick or a thin brush, and tape or liquid latex to protect the skin around your nails. Once you have gathered all your supplies, you can begin the water-marbling process.
Start by applying a base coat to your nails, allowing them to dry completely. This will help the nail polish adhere better and make the design last longer. Next, choose the colors you want to use for your design and drop a few drops of each color onto the water’s surface. Use a toothpick or a thin brush to create the desired pattern by gently swirling the colors together. Once you are satisfied with the design, carefully dip your nail into the water, submerging it completely. Use a toothpick to remove any excess polish from the water’s surface, then slowly lift your nail. Repeat this process for each pin, and don’t forget to clean up any extra polish on your skin with a cotton swab dipped in nail polish remover.
Water marbling is a versatile technique that allows you to experiment with different colors and patterns. You can create abstract designs, floral patterns, or even intricate marble patterns. The possibilities are endless, and you can achieve professional-looking results with a little practice.
In conclusion, water marbling is a fun and creative nail art technique that allows you to express your style. With its mesmerizing patterns and vibrant colors, it’s no wonder that water marbling has become so popular among nail art enthusiasts. So grab your supplies and try water marbling – you won’t be disappointed!
Gel

Gel nail art is a popular technique for creativity and long-lasting designs. It involves using a gel polish cured under a UV or LED lamp, resulting in a durable and glossy finish. Gel nail art is a versatile technique that can create various designs, from simple and elegant to bold and intricate.
One of the key advantages of gel nail art is its longevity. Unlike traditional nail polish, gel polish lasts up to two weeks without chipping or fading. This makes it an ideal choice for those who want their nail art to last longer. Gel polish dries quickly under the lamp, reducing the chances of smudging or smearing the design.
To create gel nail art, you will need a few essential tools. These include a gel base coat, gel polish in various colors, a gel top coat, a UV or LED lamp, and nail art brushes or tools for creating designs. The process involves applying the base coat, curing it under the light, applying the gel polish in thin layers, curing each layer, and finally applying the top coat and curing it to seal the design.
One of the advantages of gel nail art is that it allows for precise and intricate designs. You can use nail art brushes or tools to create patterns, shapes, or even 3D designs on your nails. Gel polish also provides a smooth and even canvas for stamping or water-marbling techniques, allowing you to achieve stunning and unique designs.
In conclusion, gel nail art is a versatile technique that offers long-lasting and creative designs. For weeks, you can create beautiful, eye-catching nail art with the right tools and methods. Whether you prefer simple and elegant designs or bold and intricate patterns, gel nail art is a great option to explore.
Dotting
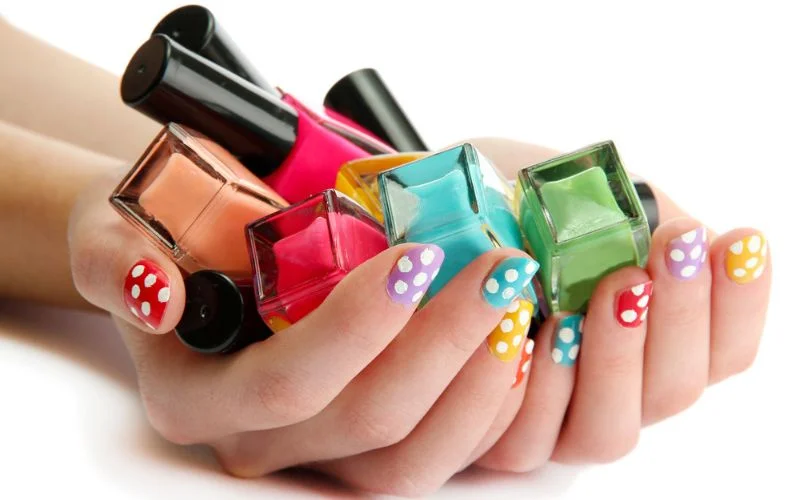
Dotting is a popular nail art technique that allows you to create intricate designs using dots of different sizes. It is a versatile technique that can be used to create various patterns and designs, making it a favorite among nail art enthusiasts.
To create dotting designs, you will need a dotting tool, which is a small tool with a rounded end that is used to create dots of different sizes. You can also use a toothpick or a bobby pin as a makeshift dotting tool if you don’t have one.
To start, apply a base coat to your nails and let them dry completely. Then, choose your desired nail polish colors and pour a small amount of each color onto a piece of paper or a palette. Dip the dotting tool into the nail polish and gently press it onto your nails to create dots. You can develop beads of different sizes by varying the pressure you apply.
Dotting can create various designs like polka dots, flowers, hearts, and abstract patterns. You can combine dotting with other nail art techniques, such as stamping or water marbling, to create more intricate designs.
To make your dotting designs last longer, apply a top coat to seal the design and add shine. This will help prevent chipping and extend the life of your nail art.
Dotting is a fun and creative nail art technique allowing you to express your style. With practice and experimentation, you can create unique and stunning designs to make your nails stand out. So grab your dotting tool and get creative with dots!
How to do Stamping?
Stamping is a popular nail art technique that allows you to create intricate designs on your nails with ease. Whether you’re a beginner or an experienced nail artist, stamping can add a fun and unique touch to your manicure. In this article, we will guide you through the step-by-step process of how to do stamping.
To start, you will need a few essential tools. These include a stamping plate, a stamping polish, a scraper, and a stamping tool. You can find stamping kits online or at your local beauty supply store. Once you have your tools ready, follow these steps:
Begin by applying a base coat to your nails. This will help protect your nails and create a smooth surface for stamping.
Choose a design from your stamping plate. There are countless designs, ranging from flowers and animals to geometric patterns and abstract art.
Apply the stamping polish to the desired design on the stamping plate. Use the scraper to remove excess polish from the container, leaving only the polish-filled structure.
Quickly transfer the design from the stamping plate to the stamping tool by gently pressing the device onto the structure.
Align the stamping tool with your nail and press down firmly to transfer the design onto your nail. Be careful not to smudge the design.
Repeat these steps for each nail, reapplying the stamping polish to the stamping plate as needed.
Once the designs are dry, apply a top coat to seal and protect your nail art.
Stamping is a versatile technique that allows you to create intricate and professional-looking nail designs. With practice, you can master this technique and create stunning nail art. So grab your stamping tools and get creative with your manicure!
How to do Water Marbling?

Water marbling is a popular nail art technique that allows you to create unique and beautiful nail designs. It involves creating patterns by dropping nail polish onto the water and transferring the design onto your nails. If you want to try water marbling for yourself, here’s a step-by-step guide to help you get started.
First, gather all the supplies you’ll need. This includes a shallow dish filled with room temperature water, a few different colors of nail polish, a toothpick or a thin brush, and some tape or liquid latex to protect your skin from the polish.
Start by applying a base coat to your nails, allowing them to dry completely. This will help the water marble design adhere better and last longer. Once your base coat is dry, you can begin the water-marbling process.
Choose your first color of nail polish and open the bottle. Hold it close to the water’s surface and gently drop a few drops of polish onto the water. Repeat this step with your other chosen colors, creating a bullseye pattern on the water’s surface.
Once you have your desired pattern, take a toothpick or a thin brush and gently drag it through the polish to create the desired design. You can experiment with ways and techniques, such as swirling the colors or creating intricate designs.
When you’re happy with your design, carefully dip your nail into the water, submerging it completely. Use a toothpick or a brush to remove any excess polish from the water’s surface before removing your pin.
Repeat these steps for each nail, cleaning up any excess polish on your skin using tape or liquid latex. Once all your nails are done, allow them to dry completely before applying a top coat to seal in your design.
Water marbling can be tricky at first, but you can create stunning designs on your nails with practice. So grab your supplies and give it a try – the possibilities are endless!
How to use Gel?
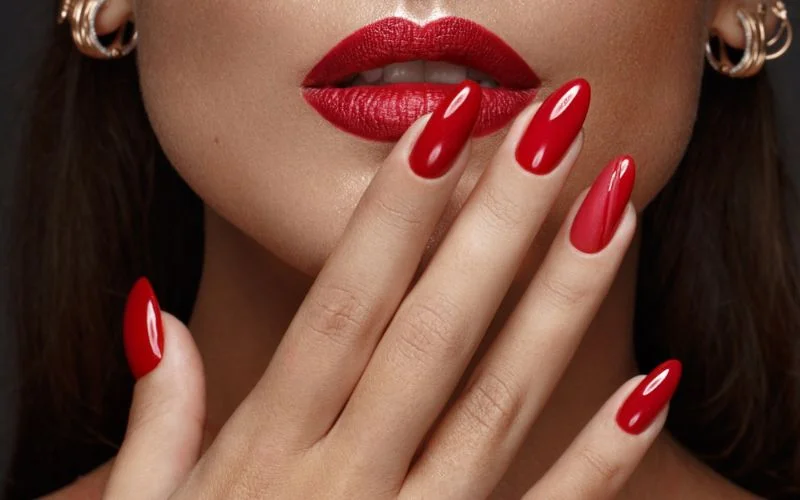
Gel nail art is a popular technique for creating beautiful and long-lasting nail designs. Whether a beginner or an experienced nail artist, learning to use Gel can take your nail art game to the next level. In this article, we will explore the steps involved in using Gel for nail art and provide tips and tricks to help you achieve stunning results.
Firstly, it’s important to prepare your nails before applying Gel. Start by cleaning your nails thoroughly and shaping them to your desired length and shape. Next, gently push back your cuticles and remove any excess skin. This will ensure the Gel adheres well to your nails and lasts longer.
Once your nails are prepped, apply a thin layer of base coat to protect your natural nails. This will also help the gel polish adhere better. Cure the base coat under a UV or LED lamp according to the manufacturer’s instructions.
Now, it’s time to apply the gel polish. Choose your desired color and apply a thin layer to your nails. Be careful not to use too much product, making a thick and uneven finish. Cure each layer of gel polish under the lamp before applying the next layer.
After applying the desired number of color layers, it’s time to add some design elements. You can use Gel to create intricate designs, such as flowers, stripes, or dots. Use a fine brush or a dotting tool to draw the plans on your nails. Cure the methods under the lamp to set them.
Finally, finish off your gel nail art with a top coat. This will add shine and protect your design from chipping. Cure the top coat under the lamp and wipe off any sticky residue with a cleanser.
Using Gel for nail art may take some practice, but you can create stunning designs lasting weeks with time and patience. Experiment with different colors and techniques to find your unique style. Happy gel nail art-ing!
Always follow the manufacturer’s instructions and take proper care of your nails to ensure the best results.
How to do Dotting?
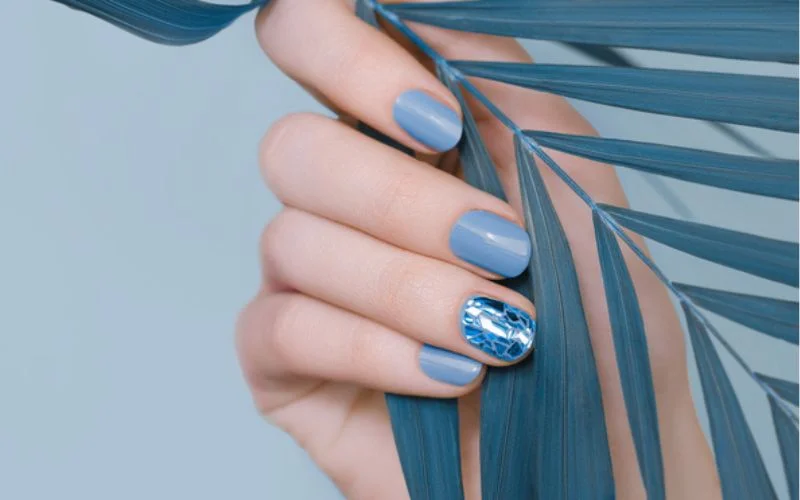
Dotting is a popular nail art technique that allows you to create intricate designs using dots of different sizes. Whether you’re a beginner or an experienced nail artist, dotting is a technique you can easily master with a little practice. In this article, we will guide you through how to do dotting and create stunning nail art designs.
To start with dotting, you will need a tool or a bobby pin. Dip the tip of the dotting tool into your desired nail polish color and gently press it onto your nail, creating a dot. You can develop beads of different sizes by varying the pressure applied and the size of the dotting tool.
One popular design you can create with dotting is the polka dot pattern. Start by applying a base coat to your nails and let them dry. Then, using a contrasting color, create dots all over your nails. You can create a random or more organized pattern, depending on your preference. Finish off with a top coat to seal in your design.
Another design that you can create with dotting is the flower pattern. Start by applying a base coat and let it dry. Then, using a dotting tool, create a larger dot in the center of your nail. Surround the center dot with smaller beads to make the flower’s petals. You can create multiple blooms on each pin or just one, depending on the look you want to achieve. Finish off with a top coat to protect your design.
Dotting is a versatile nail art technique that allows you to create endless designs. With some creativity and practice, you can create stunning nail art designs that will impress everyone. So grab your dotting tool and start experimenting with different colors and patterns. The possibilities are endless!
Conclusion
The world of nail art techniques is vast and diverse, offering endless possibilities for creative expression. Throughout this post, we have explored the key stamping, water marbling, Gel, and dotting methods and discussed how to master each.
Stamping is a versatile technique that allows you to create intricate designs using pre-designed patterns and a stamping plate. Conversely, water marbling involves creating mesmerizing patterns by swirling different nail polish colors in the water and transferring them onto the nails. Gel nails provide a long-lasting and glossy finish, making them popular among nail art enthusiasts. Lastly, dotting is a simple yet effective technique involving various designs using different-sized dots.
By providing step-by-step instructions on each technique, we have equipped you with the knowledge and skills to try them out yourself. Practice and experiment with different colors and designs to find your unique style.
The importance of nail art techniques lies in their ability to enhance your style and boost your confidence. By expressing yourself through nail art, you can make a bold fashion statement and showcase your creativity to the world.
Looking ahead, we anticipate nail art techniques will continue evolving and adapting to new trends and technologies. Advancements in nail art tools and materials may offer even more possibilities for intricate designs and long-lasting finishes. It is an exciting time to be a nail art enthusiast, as the options are truly endless.
Thank you for taking the time to read this post. We hope that you have found it informative and inspiring. We encourage you to leave any comments or feedback, as we value your input. Remember, practice makes perfect, so don’t be afraid to experiment and have fun with your nail art creations.

