

Nail stickers have become a popular trend in the world of nail art. They offer a quick and easy way to achieve intricate designs without the need for professional skills or expensive salon visits. Whether you’re a beginner or a seasoned nail enthusiast, learning how to put on nail stickers can elevate your manicure game to the next level. In this comprehensive guide, we will walk you through the step-by-step process of applying nail stickers like a pro.
First and foremost, let’s talk about the basics. Nail stickers, also known as nail decals or nail wraps, are thin adhesive designs that can be applied directly onto your nails. They come in various shapes, sizes, and patterns, allowing you to express your unique style and creativity. From floral motifs to geometric patterns, the options are endless.
To get started, you’ll need a few essential tools. These include a set of nail stickers, a pair of tweezers or a toothpick, a base coat, and a top coat. It’s important to ensure that your nails are clean and free from any oils or residues before applying the stickers. This will help them adhere better and last longer.
Now, let’s dive into the application process. Begin by applying a thin layer of base coat to your nails. This will create a smooth surface for the stickers to adhere to. Once the base coat is dry, carefully peel off the desired nail sticker using tweezers or a toothpick. Gently place the sticker onto your nail, starting from the cuticle and pressing it down towards the tip. Smooth out any air bubbles or wrinkles using your fingertip or a cuticle pusher.
Once the sticker is in place, apply a generous layer of top coat to seal and protect the design. This will also give your nails a glossy finish. Allow the top coat to dry completely before going about your daily activities.
In conclusion, nail stickers offer a fun and creative way to enhance your manicure. With a little practice and the right tools, you can easily achieve salon-worthy nail art in the comfort of your own home. So why not give it a try and let your nails do the talking? Stay tuned for our upcoming articles where we’ll explore advanced techniques, tips for long-lasting wear, and creative design ideas. Happy sticker-ing!
How to Put on Nail Stickers
Nail stickers are a fun and easy way to add some flair to your nails. Whether you’re looking to create a unique design or simply want to switch up your nail look, nail stickers are a great option. In this article, we will guide you through the process of applying nail stickers for a flawless finish.
First, start with clean and dry nails. Remove any old polish and make sure your nails are free from any oils or lotions. This will ensure that the stickers adhere properly and last longer.
Next, choose the nail stickers you want to use. There are countless designs and patterns available, so pick one that suits your style. Make sure the size of the stickers matches the size of your nails for a perfect fit.
Gently peel the sticker off the backing paper, being careful not to bend or fold it. Place the sticker on your nail and press down firmly to secure it in place. Smooth out any air bubbles or wrinkles with a cuticle pusher or your fingertips.
Once all the stickers are applied, trim any excess with a nail file. This will give your nails a neat and polished look. To make the stickers last longer, apply a clear top coat over them. This will protect the stickers from chipping and peeling.
To remove the stickers, simply peel them off gently from the edge. If there is any residue left behind, use a cotton swab dipped in nail polish remover to clean it off.
And there you have it – a simple and effective way to put on nail stickers. Experiment with different designs and have fun creating unique nail looks. With a little practice, you’ll be a nail sticker pro in no time!
Tips for Applying Nail Stickers
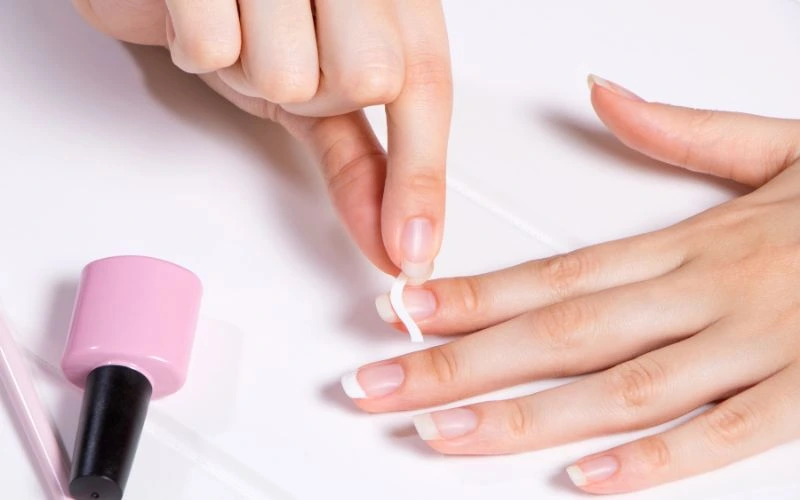
Nail stickers are a fun and easy way to add some flair to your nails without the hassle of painting intricate designs. Whether you’re a beginner or a seasoned nail art enthusiast, here are some tips to help you achieve a flawless application.
Firstly, it’s important to start with clean and dry nails. Remove any old polish and wash your hands thoroughly to ensure a smooth surface for the stickers to adhere to. If your nails are oily, you can use a nail polish remover or rubbing alcohol to remove any excess oils.
Next, choose the right size sticker for each nail. It’s better to go slightly smaller than larger, as you can always stretch the sticker to fit your nail. Gently peel the sticker from the backing and place it on your nail, starting from the cuticle and pressing it down towards the tip. Smooth out any air bubbles or wrinkles with a cuticle pusher or your finger.
To make your nail stickers last longer, apply a top coat over them. This will seal the edges and prevent them from peeling off. You can also use a clear base coat before applying the stickers to create a smoother surface.
If you want to create a more intricate design, you can layer different stickers or combine them with nail polish. Get creative and experiment with different patterns and colors to achieve a unique look.
Remember to take care of your nails and avoid activities that may cause the stickers to lift or chip. Avoid excessive hand washing or using harsh chemicals without gloves. With proper care, your nail stickers can last up to a week.
In conclusion, applying nail stickers is a simple and fun way to create beautiful nail art. By following these tips, you can achieve a professional-looking manicure in no time. So go ahead, unleash your creativity, and have fun with nail stickers!
Common Nail Sticker Mistakes to Avoid
Applying nail stickers can be a fun and convenient way to add some flair to your nails. However, there are some common mistakes that people often make when using nail stickers. By avoiding these mistakes, you can ensure that your nail stickers look flawless and last longer.
One common mistake is not properly preparing your nails before applying the stickers. It’s important to clean your nails thoroughly and remove any old polish or oils. This will help the stickers adhere better and prevent them from peeling off prematurely.
Another mistake is not sizing the stickers correctly. Nail stickers come in various sizes, so it’s important to choose the ones that fit your nails perfectly. If the stickers are too big or too small, they won’t adhere properly and may start to lift at the edges.
Using too much pressure when applying the stickers is another common mistake. You should gently press the stickers onto your nails, ensuring that they are smooth and free of any air bubbles. Applying too much pressure can cause the stickers to wrinkle or tear.
Not sealing the stickers with a top coat is another mistake to avoid. A top coat will not only protect the stickers from chipping but also give them a glossy finish. It’s important to apply the top coat over the entire nail, including the edges of the stickers, to ensure they stay in place.
Lastly, removing the stickers incorrectly can also lead to mistakes. It’s important to gently peel off the stickers from the edges, rather than pulling them off forcefully. This will prevent any damage to your natural nails and ensure a clean removal.
By avoiding these common mistakes, you can achieve a flawless and long-lasting nail sticker application. With a little practice and attention to detail, you’ll be able to create beautiful and eye-catching nail designs using nail stickers.
Removing Nail Stickers Safely
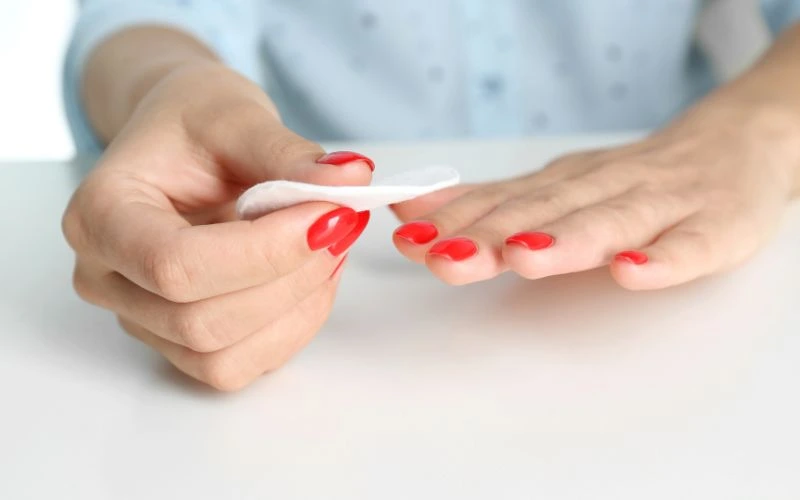
Nail stickers are a fun and easy way to add some flair to your nails. They come in a variety of designs and colors, allowing you to express your personal style. However, when it comes time to remove them, it’s important to do so safely to avoid damaging your nails. Here are some tips on how to remove nail stickers without causing any harm.
First, gather all the necessary tools. You will need a nail polish remover, cotton balls or pads, a cuticle pusher or orange stick, and a nail file. Make sure these tools are easily accessible before you begin.
Start by soaking a cotton ball or pad in nail polish remover. Place the soaked cotton on your nail and wrap it with aluminum foil. This will help to loosen the adhesive on the nail sticker. Leave it on for about 10 minutes to allow the nail polish remover to work its magic.
After 10 minutes, remove the foil and cotton ball. Gently push back your cuticles using a cuticle pusher or orange stick. This will help to lift the nail sticker from your nail bed.
Next, use a nail file to gently file away any remaining adhesive or residue. Be careful not to file too aggressively, as this can damage your nails. Take your time and be patient.
Once all the adhesive is removed, wash your hands thoroughly to remove any residue from the nail polish remover. Apply a moisturizing hand cream or cuticle oil to hydrate your nails and cuticles.
And there you have it! By following these steps, you can safely remove nail stickers without causing any harm to your nails. Remember to always take your time and be gentle when removing them. Happy sticker removal!
Choosing the Right Nail Sticker Design
Nail stickers have become a popular trend in the world of nail art. They offer a quick and easy way to achieve stunning nail designs without the need for intricate painting skills. However, with so many options available, it can be overwhelming to choose the right nail sticker design. In this article, we will guide you through the process of selecting the perfect nail sticker design for your style and occasion.
Firstly, consider the occasion for which you will be wearing the nail stickers. Are you attending a formal event or simply looking to add some fun to your everyday look? For formal occasions, opt for elegant designs such as floral patterns or metallic accents. If you’re looking to make a statement, go for bold and vibrant designs like animal prints or geometric patterns.
Next, consider your personal style and preferences. Are you someone who likes minimalistic designs or do you prefer bold and intricate patterns? Nail stickers come in a wide range of styles, from simple and understated to elaborate and eye-catching. Choose a design that reflects your personality and complements your overall look.
Another important factor to consider is the length and shape of your nails. Certain designs may look better on longer nails, while others may be more suitable for shorter nails. Additionally, the shape of your nails can also influence the design choice. For example, geometric patterns may look better on square-shaped nails, while curved designs may suit rounded nails.
Lastly, take into account the colors that you usually wear. Nail stickers come in a variety of colors, so it’s important to choose a design that complements your wardrobe. If you tend to wear neutral tones, opt for nail stickers in shades of nude or pastel. For those who love vibrant colors, go for bold and bright designs that will make a statement.
In conclusion, choosing the right nail sticker design is all about considering the occasion, your personal style, the length and shape of your nails, and the colors you usually wear. By keeping these factors in mind, you can easily find the perfect nail sticker design that will enhance your overall look and make a lasting impression.
Prepping Your Nails for Nail Stickers

Nail stickers are a fun and easy way to add some flair to your manicure. Whether you’re looking to create a unique design or simply want to add a pop of color, nail stickers are a great option. But before you start applying them, it’s important to properly prep your nails to ensure that the stickers adhere properly and last longer.
First, start by cleaning your nails. Remove any old polish and make sure your nails are clean and dry. This will help the stickers adhere better and prevent any dirt or oil from interfering with the adhesive.
Next, gently push back your cuticles using a cuticle pusher or a wooden stick. This will create a clean canvas for the stickers and prevent them from lifting or peeling off.
After pushing back your cuticles, lightly buff the surface of your nails using a nail buffer. This will help remove any ridges or unevenness, creating a smooth surface for the stickers to adhere to.
Once your nails are clean and buffed, it’s time to apply a base coat. This will not only protect your nails from staining but also provide a smooth base for the stickers. Allow the base coat to dry completely before moving on to the next step.
Now, it’s time to apply the nail stickers. Carefully peel them off the sheet using tweezers and place them onto your nails. Gently press down to ensure they adhere properly. If needed, you can use a small brush or toothpick to smooth out any air bubbles or wrinkles.
Finally, seal the stickers with a top coat to protect them and make them last longer. Apply a generous layer of top coat, making sure to cover the entire nail and the edges of the stickers. Allow the top coat to dry completely before touching anything.
And there you have it! Your nails are prepped and ready for some fabulous nail stickers. Enjoy your new manicure and have fun experimenting with different designs and colors!
Sealing Nail Stickers for Long-lasting Wear
Nail stickers are a fun and easy way to add some flair to your nails. Whether you’re looking for a quick and temporary nail art solution or want to experiment with different designs, nail stickers are a great option. However, to ensure that your nail stickers last as long as possible, it’s important to seal them properly. In this article, we will discuss some tips and tricks to help you achieve long-lasting wear with your nail stickers.
One of the most important steps in sealing nail stickers is to apply a top coat. This will not only protect the stickers from chipping and peeling but also give them a glossy finish. Make sure to apply the top coat evenly, covering the entire surface of the nail sticker. Allow it to dry completely before moving on to the next step.
Another tip to enhance the longevity of your nail stickers is to avoid exposing them to excessive moisture. While nail stickers are generally water-resistant, prolonged exposure to water can cause them to loosen or peel off. To prevent this, try to avoid activities that involve a lot of water, such as swimming or doing dishes without gloves. If your nails do come into contact with water, gently pat them dry with a towel instead of rubbing.
Additionally, it’s important to be gentle with your nails when wearing nail stickers. Avoid using your nails as tools or engaging in activities that could cause them to chip or break. By treating your nails with care, you can help ensure that your nail stickers stay intact for longer.
In conclusion, sealing nail stickers is essential for achieving long-lasting wear. By applying a top coat, avoiding excessive moisture, and being gentle with your nails, you can enjoy your nail stickers for an extended period of time. So go ahead and have fun experimenting with different designs and styles, knowing that your nail stickers will stay put and look fabulous!
Adding a Top Coat for Extra Durability
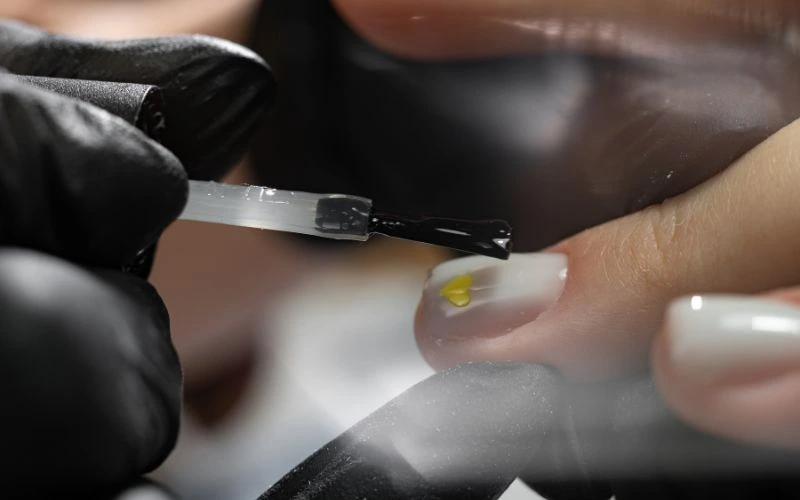
Nail stickers are a fun and trendy way to add some pizzazz to your nails. They come in various designs and are easy to apply. However, to ensure they last as long as possible, it’s important to take some extra steps. One of these steps is adding a top coat for extra durability.
A top coat acts as a protective layer over the nail stickers, preventing them from chipping or peeling off. It also adds shine and prolongs the life of the stickers. To apply a top coat, follow these simple steps:
- Start by applying the nail stickers as instructed. Make sure they are properly aligned and smooth out any air bubbles.
- Once the stickers are in place, wait for them to dry completely. This usually takes a few minutes, but it’s important not to rush this step.
- Next, take your chosen top coat and apply a thin layer over the entire nail. Make sure to cover the edges of the stickers to seal them in.
- Allow the top coat to dry completely. This usually takes a few minutes, but it’s worth the wait to ensure a long-lasting result.
- For added durability, you can repeat steps 3 and 4 to apply a second layer of top coat. This will provide an extra barrier against wear and tear.
By adding a top coat to your nail stickers, you can enjoy them for a longer period of time. The top coat will protect the stickers from everyday activities such as typing, washing dishes, or even just regular wear and tear.
Remember to choose a high-quality top coat for best results. Look for one that is specifically formulated for nail art or stickers. This will ensure that it adheres well to the stickers and provides maximum durability.
So, the next time you apply nail stickers, don’t forget to add a top coat for extra durability. Your nails will thank you!
In conclusion, this post has provided a comprehensive guide on how to put on nail stickers. We have covered various topics such as tips for applying nail stickers, common mistakes to avoid, removing nail stickers safely, choosing the right design, prepping your nails, sealing for long-lasting wear, and adding a top coat for extra durability.
By following the techniques and tips mentioned in this post, you can easily achieve a professional-looking manicure with nail stickers. Whether you are a beginner or an experienced nail enthusiast, these step-by-step instructions will help you achieve flawless results.
It is important to emphasize the significance of nail stickers in today’s beauty industry. They offer a convenient and affordable alternative to traditional nail art techniques. With a wide range of designs available, you can easily express your personal style and creativity.
As with any beauty technique, there are common mistakes to avoid. By being aware of these pitfalls, you can ensure a smooth and successful application. Additionally, we have provided insights on how to safely remove nail stickers without damaging your nails.
Looking ahead, the nail sticker industry is constantly evolving with new designs and trends. Keep an eye out for innovative developments such as holographic or 3D nail stickers. These advancements will continue to enhance the nail art experience and provide even more options for self-expression.
Thank you for taking the time to read this post. We hope that you have found it informative and helpful. We encourage you to leave any comments or feedback, as we value your input. Share your experiences and tips with fellow readers, and let us know if there are any specific topics you would like us to cover in future posts.
Remember, with the right techniques and a little creativity, you can achieve stunning nail art with nail stickers. So go ahead, give it a try, and enjoy the beautiful results!

