

Adorning your nails with rhinestone designs is a trend that never goes out of style. These tiny, glimmering gems can instantly elevate any manicure from simple to stunning. Whether you prefer a subtle touch of sparkle or a full-on blinged-out look, rhinestones offer endless possibilities for creativity and self-expression.
From elegant and understated designs to bold and eye-catching patterns, rhinestones can create a wide range of looks to suit any occasion. Whether you’re getting ready for a special event or want to add a bit of glamour to your everyday style, rhinestone designs on nails are the perfect way to make a statement.
The beauty of rhinestone nail art lies in its versatility. You can mix and match different colors, shapes, and sizes of rhinestones to create a unique, personalized look that reflects your style. Whether you’re a fan of classic designs or prefer to experiment with the latest trends, rhinestones offer a world of possibilities for creating stunning nail art.
So why not add a touch of sparkle and shine to your next manicure with rhinestone nail designs? Whether you’re a nail art novice or a seasoned pro, there’s no limit to the creativity and beauty you can achieve with these dazzling gems. Let your imagination run wild, and watch as your nails transform into works of art that will turn heads wherever you go.
How to Apply Rhinestones on Nails?
Rhinestone designs on nails are a popular trend in the world of nail art. These tiny, sparkly gems can add a touch of glamour and sophistication to any manicure. But how exactly do you apply rhinestones to your nails?
- First, start with clean, dry nails. Apply a base coat to help the rhinestones adhere better. Then, choose the rhinestones you want to use. They come in various shapes, sizes, and colors so that you can get creative with your designs.
- Next, apply a small dot of nail glue to the spot on your nail where you want to place the rhinestone. Use a toothpick or a rhinestone picker to pick up the rhinestone and carefully place it on the glue. Press down gently to secure it in place.
- Repeat this process for each rhinestone you want to add to your nails. You can create intricate designs or keep it simple with a single rhinestone accent on each nail.
- Once you’ve finished applying the rhinestones, let the glue dry completely. Finish off with a top coat to seal in the rhinestones and add extra shine to your manicure.
With some practice and patience, you can master applying rhinestones to your nails and create stunning, eye-catching designs. So go ahead and add some sparkle to your next manicure!
Best Rhinestone Shapes for Nail Designs
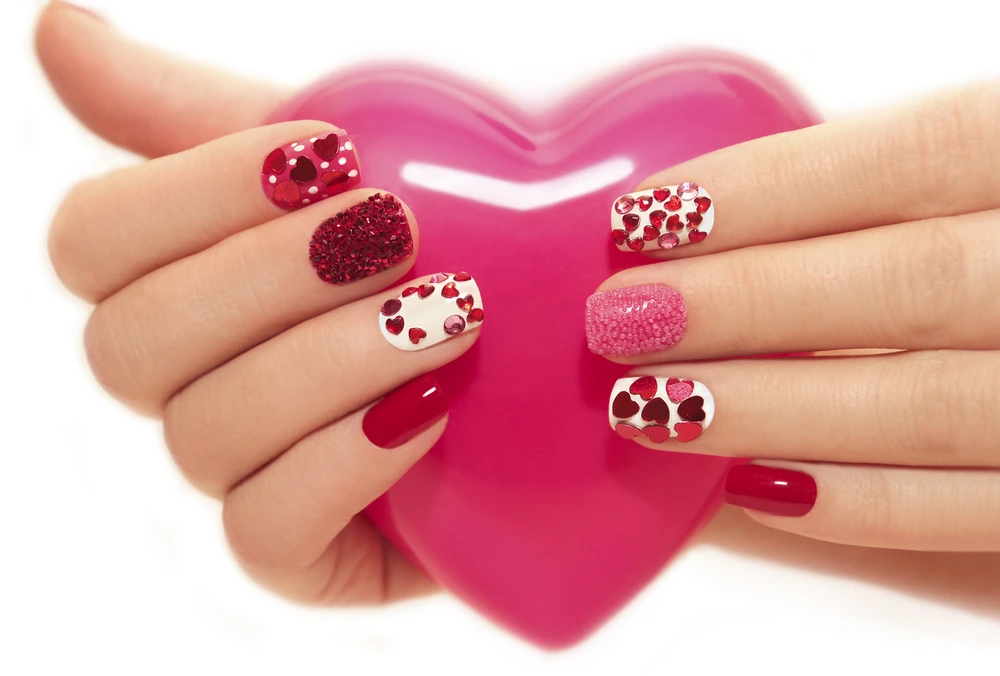
When creating stunning nail designs with rhinestones, the shape of the rhinestones you choose can make all the difference. Different shapes evoke different moods and styles, so it’s important to choose wisely. Here are some of the best rhinestone shapes for nail designs to make your nails stand out.
Classic Round Shape
The classic round shape is one of nail designs’ most popular rhinestone shapes. Round rhinestones are versatile and can be used in various designs, from simple and elegant to bold and eye-catching. They are perfect for adding a touch of sparkle to any manicure.
Teardrop-Shapes Rhinestones
If you’re looking for something more unique, consider using teardrop-shaped rhinestones. These elegant stones can create a sophisticated and artistic look on your nails, perfect for special occasions or events.
Geometric-Shaped Rhinestones
For a more edgy and modern nail design, try using geometric-shaped rhinestones. Triangles, squares, and rectangles can add a contemporary and fashion-forward touch to your manicure, perfect for those who want to make a statement with their nails.
Heart-Shaped Rhinestones
Heart-shaped rhinestones are perfect for creating romantic and whimsical nail designs. Whether for a cute and playful look or a more elegant and romantic style, heart-shaped rhinestones are a versatile option that can add a touch of love to your nails.
No matter your shape, rhinestones are a fun and creative way to elevate nail designs. Experiment with different shapes and sizes to find the perfect look for you.
How to Secure Rhinestones on Nails?
Rhinestone designs on nails have become increasingly popular in recent years, adding a touch of glamour and sparkle to any manicure. However, one common concern among nail enthusiasts is properly securing these dazzling embellishments to ensure they stay in place for as long as possible.
Nail Glue
One effective method for securing rhinestones on nails is to use nail glue. This adhesive is specifically designed for use on nails and provides a strong bond that can withstand daily activities. To apply rhinestones with nail glue, place a small glue dot on the back of the rhinestone and press it firmly onto the nail. Be sure to allow the glue to dry completely before moving on to the next step.
Top Coat or Clear Nail Polish
Another option for securing rhinestones on nails is to use a top coat or clear nail polish. Apply a thin layer of polish to the nail, place the rhinestone on top, and then seal it with another layer of polish. This method works well for smaller rhinestones or designs that require more precision.
Nail Stickers or Adhesive Tabs
For temporary options, nail stickers or adhesive tabs can also secure rhinestones on nails. Peel off the backing, place the sticker or tab on the nail, and press the rhinestone. This method is quick and easy, perfect for special occasions or events.
Securing rhinestones on nails is a fun and creative way to add sparkle to your manicure. Whether you opt for nail glue, a top coat, or stickers, there are plenty of options to achieve the perfect rhinestone design.
Popular Rhinestone Colors for Nail Art
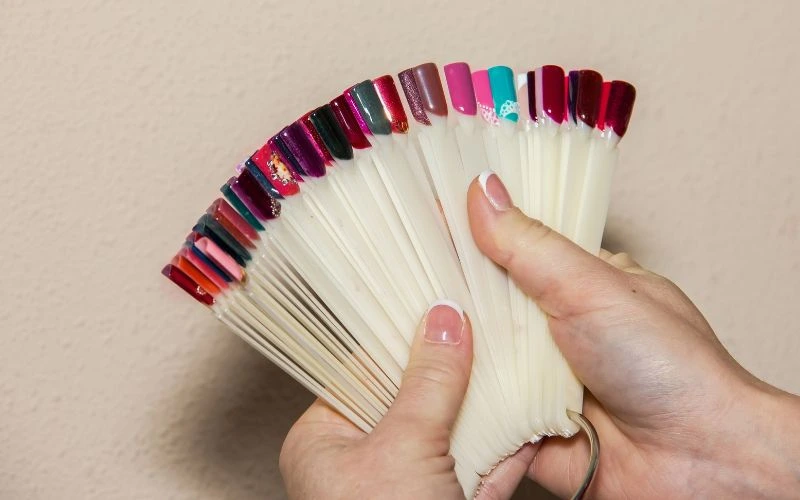
Choosing the right colors can make all the difference when creating stunning nail art designs with rhinestones. From classic shades to trendy hues, there are endless options to suit every style and personality.
- One of the most popular rhinestone colors for nail art is clear. Clear rhinestones are versatile and can be used to add a touch of sparkle to any nail design. They complement any base color and create a subtle, elegant look.
- For those who prefer a bolder look, red rhinestones are a popular choice. Whether used as accents or covering the entire nail, red rhinestones will make a statement. They are perfect for creating glamorous, eye-catching designs.
- Another popular color for rhinestone nail art is blue. Blue rhinestones come in various shades, from deep navy to vibrant turquoise. They add a pop of color to any design and are perfect for creating fun, playful nail art looks.
- In addition to clear, red, and blue, other popular rhinestone colors include pink, purple, and gold. These colors can be mixed and matched to create unique and creative nail art designs that reflect your style.
Whether you prefer classic elegance or bold glamour, a rhinestone color suits every taste. Experiment with different shades and combinations to create stunning nail art that will turn heads.
Where to Buy Quality Rhinestones for Nails?
When creating stunning rhinestone designs on nails, the quality of the rhinestones you use can make all the difference. Finding the right place to purchase high-quality rhinestones is essential for achieving professional-looking results. Luckily, several options are available for sourcing top-notch rhinestones for your nail art projects.
Online Retailers
One popular choice for buying quality rhinestones is online retailers. Websites like Amazon, eBay, and Etsy offer a wide selection of rhinestones in various shapes, sizes, and colors. These online platforms often have customer reviews and ratings that can help you determine the quality of the rhinestones before making a purchase.
Nail Art Stores
Another option for purchasing rhinestones is specialty nail art stores. These stores typically carry various nail art supplies, including high-quality rhinestones in multiple designs. Visiting a physical store can also allow you to see the rhinestones up close and ensure they meet your standards.
Beauty Supply Stores
If you prefer to shop in person, beauty supply stores and craft stores may also carry rhinestones suitable for nail art. These stores often have a selection of rhinestones in different sizes and colors, making it easy to find the perfect embellishments for your nail designs.
No matter where you buy your rhinestones, look for options made from durable materials with strong adhesive backing. Investing in quality rhinestones can create beautiful, long-lasting nail art designs that will turn heads.
Tips for Creating Intricate Rhinestone Nail Designs

When creating stunning nail art with rhinestones, attention to detail is key. To achieve intricate designs that stand out, follow these expert tips.
- First, start with a clean and well-prepped nail surface. This will ensure that the rhinestones adhere properly and last longer. Use a base coat to protect your nails and provide a smooth canvas for your design.
- Next, carefully select your rhinestones. Choose various sizes, shapes, and colors to add dimension to your design. Consider using tweezers or a rhinestone picker tool to place the stones on your nails easily.
- Experiment with different placement patterns to create unique designs. Try making a gradient effect with rhinestones or a geometric pattern for a modern look. Don’t be afraid to mix and match different rhinestone sizes for added visual interest.
- To ensure your rhinestone design lasts, seal it with a top coat. This will protect the stones from falling off and give your nails a glossy finish.
Remember, practice makes perfect when creating intricate rhinestone nail designs. Don’t be afraid to experiment and have fun with different techniques. With these tips, you can create stunning nail art that sparkles and shines.
How to Remove Rhinestones from Nails Safely?
Removing rhinestones from nails can be tricky, but with the right technique, you can ensure that your nails stay healthy and undamaged. A gentle nail polish remover is one of the safest ways to remove rhinestones from nails. Soak a cotton ball in nail polish remover and hold it against the rhinestone for a few seconds to loosen the adhesive. Gently peel off the rhinestone with a cuticle pusher, being careful not to damage your nail bed.
Another method for safely removing rhinestones from nails is using a wooden or orangewood stick. Slide the stick underneath the rhinestone and gently lift it off your nail. This method is especially effective for larger rhinestones that may be difficult to remove with a cotton ball.
If you’re dealing with stubborn rhinestones that won’t budge, you can try soaking your nails in warm, soapy water for a few minutes to help loosen the adhesive. Once the rhinestones are easier to remove, use a gentle touch to avoid damaging your nails.
Remember always to be patient and gentle when removing rhinestones from your nails to prevent damage. By following these tips, you can safely remove rhinestones from your nails without causing harm to your natural nails.
Rhinestone Nail Design Inspiration

Rhinestone nail designs are a glamorous and eye-catching way to elevate your manicure. Whether you’re looking for a subtle touch of sparkle or a full-on blinged-out look, there are endless possibilities for incorporating rhinestones into your nail art.
One popular trend is creating a gradient effect using varying-sized rhinestones. Start with a few larger stones near the base of the nail, then gradually decrease the size as you move towards the tip. This creates a stunning ombre effect that is sure to turn heads.
For a more intricate look, consider creating a geometric pattern using rhinestones. Try alternating between different shapes and sizes to create a unique design that stands out. You can also play with other color combinations to make your nail art unique.
If you’re bold, why not try a full-coverage rhinestone nail design? Covering your entire nail in rhinestones may seem like a lot, but the result is stunning. Just be prepared for all the attention your nails will attract!
No matter your style, rhinestone nail designs are a fun and creative way to express yourself. So unleash your inner sparkle and get inspired to create your dazzling nail art masterpiece.
Conclusion
In conclusion, rhinestone designs on nails are a fun and glamorous way to elevate your manicure game. From learning how to apply rhinestones with precision to choosing the best shapes and colors for your designs, there are endless possibilities for creating stunning nail art. Securing rhinestones properly is key to ensuring they stay in place and last longer while also exploring different sources for quality rhinestones that can make a huge difference in the overall look of your nail designs.
When creating intricate rhinestone nail designs, patience and practice are essential. Removing rhinestones safely is also important to prevent any damage to your nails. Drawing inspiration from various sources can help spark your creativity and lead to unique and eye-catching designs.
As trends in nail art continue to evolve, we can expect to see new techniques and styles emerge in rhinestone designs. Keeping up with these developments can help you stay ahead of the curve and experiment with fresh ideas for your nail art.
Thank you for taking the time to read this post on rhinestone designs on nails. We hope you found it informative and inspiring. Feel free to leave any comments or feedback below, and don’t forget to share your rhinestone nail design creations with us!

