

Butterfly nail art has taken the beauty world by storm, captivating nail enthusiasts with its delicate and whimsical designs. From vibrant and colorful patterns to subtle and elegant creations, butterfly nail art offers endless possibilities for self-expression and creativity. Whether you’re a nail art novice or a seasoned pro, this trend will inspire and ignite your imagination.
The allure of butterfly nail art lies in its ability to transform your nails into miniature works. With intricate details and intricate designs, each nail becomes a canvas for self-expression. From lifelike butterflies to abstract interpretations, there is a style to suit every taste and occasion.
One of the most exciting aspects of butterfly nail art is the vast array of colors and techniques that can be used. The color palette is as diverse as the butterfly species, from soft pastels to bold neons. Gradient effects, ombre techniques, and glitter accents add depth and dimension to the designs, creating a mesmerizing visual display.
Butterfly nail art is not only visually stunning but also carries symbolic meaning. Butterflies are often associated with transformation, growth, and freedom. By adorning your nails with these delicate creatures, you can embrace and embody these positive qualities in your daily life.
Whether you prefer a minimalist approach or a more extravagant design, butterfly nail art can be tailored to suit your style. It can be a subtle accent on a single nail or a bold statement across all ten. The versatility of this trend allows for endless experimentation and customization.
The following article will delve deeper into butterfly nail art, exploring various techniques, designs, and tips for achieving stunning results. From step-by-step tutorials to expert advice, we will guide you in mastering this fluttering trend. So, prepare to spread your wings and dive into the enchanting world of butterfly nail art.
What Are Some Popular Butterfly Nail Art Designs?
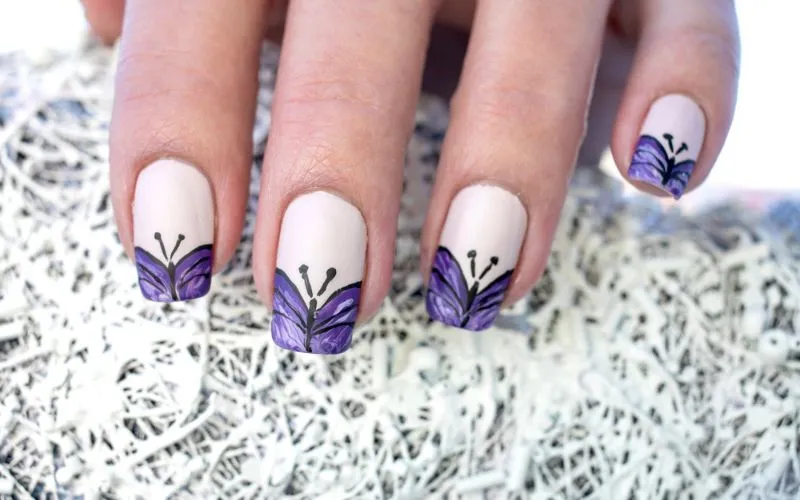
Butterfly nail art has become a popular trend in recent years, with many people embracing the beauty and elegance of these delicate creatures at their fingertips. From simple and minimalistic designs to intricate and detailed artwork, there are countless options to choose from when it comes to butterfly nail art. This section will explore some of the most popular designs that have taken the nail art world by storm.
One of the classic butterfly nail art designs is the butterfly wing pattern. This design features the shape of a butterfly’s wings painted on each nail, creating a stunning and symmetrical look. The wings can be made in various colors, from vibrant bold to soft and pastel, allowing for endless creativity.
Another popular design is the 3D butterfly nail art. This design involves adding tiny butterfly embellishments to the nails, creating a three-dimensional effect. These embellishments can be made from various materials, such as rhinestones, beads, or even tiny charms. The 3D effect adds depth and dimension to the nails, making them eye-catching.
The negative space butterfly nail art is a great option for those who prefer a more subtle look. This design incorporates the nails’ natural color as part of the butterfly’s wings, creating a minimalist and chic look. The design creates a unique and artistic effect by leaving parts of the nails unpainted.
If you’re feeling adventurous, try the butterfly ombre nail art. This design combines the popular ombre trend with the beauty of butterflies. By blending two or more colors on each nail, you can create a gradient effect that resembles the colors of a butterfly’s wings. This design is perfect for those who want to make a bold statement with their nails.
Butterfly nail art offers a wide range of options for those looking to express their creativity and embrace the beauty of nature at their fingertips. Whether you prefer a simple and minimalistic design or a more intricate and detailed artwork, there is a butterfly nail art design for everyone. So why not let your nails flutter with elegance and charm?
How Do You Create a Butterfly Nail Art Design?
Butterfly nail art designs have become increasingly popular in recent years. They add a touch of elegance and whimsy to any manicure. If you want to try out this trendy nail art design, here’s how to create your own butterfly nail art.
First, start by preparing your nails. Please make sure they are clean and free of any old nail polish. Trim and shape your nails to your desired length and file them to smooth out any rough edges. Apply a base coat to protect your nails and allow them to dry completely.
Next, choose your desired butterfly design. Countless options are available, ranging from simple and minimalistic to intricate and detailed. You can find inspiration from online tutorials and nail art magazines or create your unique design.
Once you have your design in mind, gather the necessary tools. You’ll need a thin nail art brush, a dotting tool, and various nail polish colors. Choosing colors that complement each other and create a cohesive look is best.
Start by painting your nails with a base color that will serve as the background for your butterfly design. Once the base color is dry, use the thin nail art brush to create the outline of the butterfly. Start with the body and then add the wings on either side.
Once the outline is complete, use the dotting tool to add details to the wings. You can create patterns and dots or add glitter for extra sparkle. Be creative and experiment with different techniques to achieve the desired look.
Finally, seal your design with a top coat to protect it and make it last longer. Allow the top coat to dry completely before going about your day.
Creating a butterfly nail art design may require some practice, but you can achieve stunning results with patience and creativity. So, gather your tools, choose your design, and let your imagination take flight with butterfly nail art!
What Tools and Materials Are Needed for Butterfly Nail Art?
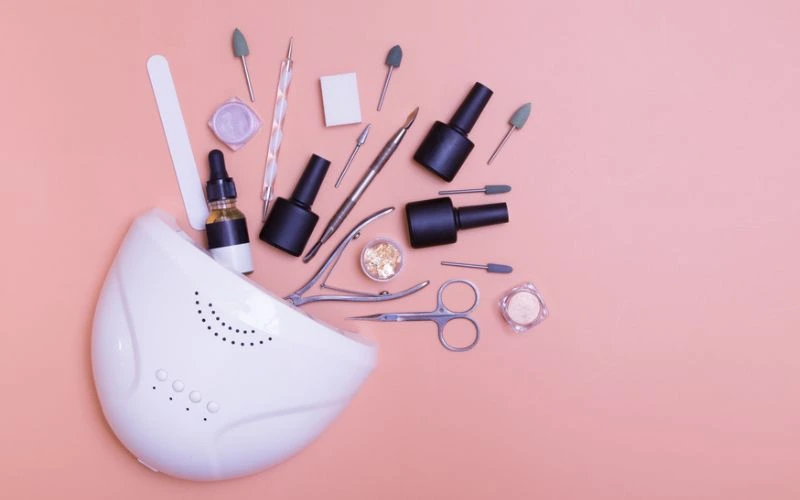
Butterfly nail art is a popular trend that allows individuals to express their creativity and add a touch of whimsy to their nails. You will need a few essential tools and materials to achieve stunning butterfly nail art designs. This section will explore the must-have items for creating beautiful butterfly nail art.
One of the primary tools you will need is a set of nail art brushes. These brushes come in various sizes and shapes, allowing you to create intricate details on your nails. Look for brushes with fine bristles that can be used for delicate butterfly wings or fine lines. Additionally, having a dotting tool can be beneficial for creating the butterfly’s body or adding small details.
Regarding materials, you will need a base coat and a top coat to protect your nails and make the design last longer. Nail polish in various colors is also essential for creating the butterfly’s wings. Consider using vibrant and contrasting colors to make your butterfly nail art stand out.
You can use nail art accessories such as nail stickers, rhinestones, or glitter to add dimension and texture to your design. These elements can be applied to the butterfly wings or used as accents on other nail parts.
Lastly, having a good quality nail polish remover and cotton pads on hand is crucial. This will allow you to correct any mistakes or remove the design when ready for a new look.
Creating stunning butterfly nail art requires a set of nail art brushes, various nail polish colors, nail art accessories, a base coat and top coat, and nail polish remover. With these tools and materials, you can let your creativity soar and transform your nails into beautiful butterfly masterpieces.
What Are Some Tips for Creating a Perfect Butterfly Nail Art?
Butterfly nail art is a popular trend, allowing you to express your creativity and add a whimsy to your nails. Whether you’re a beginner or an experienced nail artist, here are some tips to help you create a perfect butterfly nail art design.
Firstly, start with a clean canvas. Make sure your nails are free from any old polish and are neatly trimmed. This will provide a smooth surface for your butterfly design and allow the colors to pop.
Next, choose your colors wisely. Butterflies come in various vibrant hues, so don’t be afraid to experiment. Opt for bright shades like blues, pinks, and purples to create a striking, eye-catching design. You can also incorporate metallic or glitter polishes for added glamour.
Precision is key when it comes to creating the butterfly shape. Use a thin nail art brush or a toothpick to draw the outline of the butterfly wings carefully. Start with a small dot in the center of the nail and create two curved lines on either side to form the wings. Fill in the wings with your chosen colors, blending them for a seamless gradient effect.
Consider adding details like spots or patterns to add depth and dimension to your butterfly. You can use a dotting tool or a small brush to create these intricate designs. Don’t forget to seal your design with a top coat to protect it and make it last longer.
Remember, practice makes perfect. Don’t be discouraged if your first attempt at butterfly nail art doesn’t turn out exactly as you envisioned. Keep experimenting and trying different techniques, and soon, you’ll create stunning butterfly designs that turn heads.
Creating a perfect butterfly nail art design requires patience, precision, and a bit of creativity. With these tips, you can create beautiful, intricate butterfly designs to make your nails stand out. So grab your nail polish and brushes, and let your imagination take flight!
How Long Does It Take to Create Butterfly Nail Art?
Butterfly nail art has become increasingly popular in recent years, with its delicate and intricate designs capturing the attention of enthusiasts everywhere. If you’re considering trying out this stunning nail trend, you might wonder how long it takes to create butterfly nail art. While the time required may vary depending on your skill level and the complexity of the design, there are a few factors to consider.
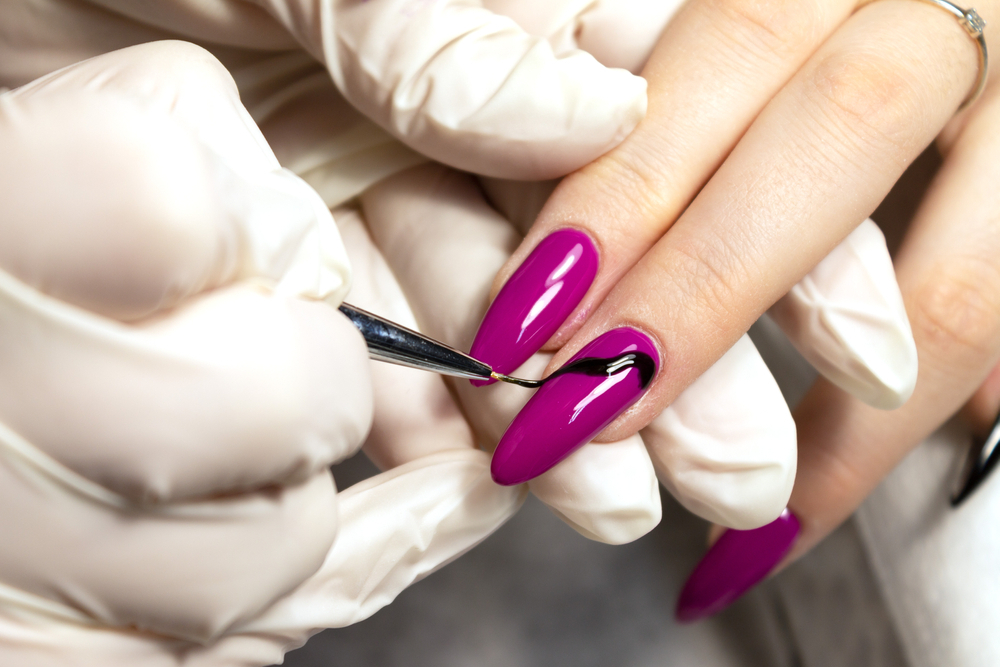
Firstly, the time it takes to create butterfly nail art depends on your chosen technique. Several ways to achieve butterfly designs on your nails include freehand painting, stamping, and using nail decals or stickers. Each method requires a different amount of time and skill. Freehand painting, for example, can be time-consuming as it involves painting intricate details directly onto the nail surface.
The complexity of the design also plays a role in the time required. Simple butterfly designs with minimal details may take less time than more intricate designs with multiple colors and patterns. Additionally, if you’re adding embellishments like rhinestones or glitter, the application process can extend the overall time needed.
Another factor to consider is your own experience and skill level. Beginners may take longer to create butterfly nail art than experienced individuals who have mastered the techniques and can work more quickly.
The time it takes to create butterfly nail art can vary depending on the technique, complexity of the design, and your skill level. Whether you’re a beginner or a seasoned nail artist, experimenting with butterfly nail art is a fun and creative way to express yourself. So grab your nail polish and brushes, and let your imagination take flight with these beautiful butterfly designs!
Can Butterfly Nail Art Be Done on Natural Nails?
Butterfly nail art has become increasingly popular in recent years, with many people adorning their nails with beautiful butterfly designs. However, one question often arises is whether butterfly nail art can be done on natural nails. The answer is a resounding yes!
When creating butterfly nail art on natural nails, there are a few key factors to consider. First and foremost, it’s important to ensure that your natural nails are in good condition. This means keeping them clean, trimmed, and well-maintained. Healthy nails, including butterfly patterns, provide a solid foundation for any nail art design.
You will need a few essential tools to create butterfly nail art on natural nails. These include nail polish in various colors, a thin nail art brush, and a dotting tool. Start by applying a base coat to your nails to protect them and help the design last longer. Once the base coat is dry, you can create your butterfly design.
Using the nail art brush, carefully outline a butterfly on your nail. You can create a realistic butterfly design or opt for a more abstract interpretation. Once the outline is complete, use the dotting tool to add details such as the butterfly’s body, antennae, and wings.
Consider adding some additional elements to make your butterfly nail art stand out. Glitter, rhinestones, and other embellishments can add a touch of sparkle and dimension to your design. Experiment with color combinations and patterns to create a unique, eye-catching look.
Butterfly nail art can indeed be done on natural nails. With the right tools and techniques, you can create stunning butterfly designs that will make your nails the envy of all. So go ahead, unleash your creativity, and embrace the beauty of butterfly nail art on your natural nails.
How to Remove Butterfly Nail Art Without Damaging Nails?
Butterfly nail art has become a popular trend in nail design. It adds a touch of elegance and beauty to your nails, but what happens when you want to remove it? Removing butterfly nail art can be tricky, as you want to avoid damaging your nails. In this section, we will discuss some effective methods to remove butterfly nail art without causing any harm.
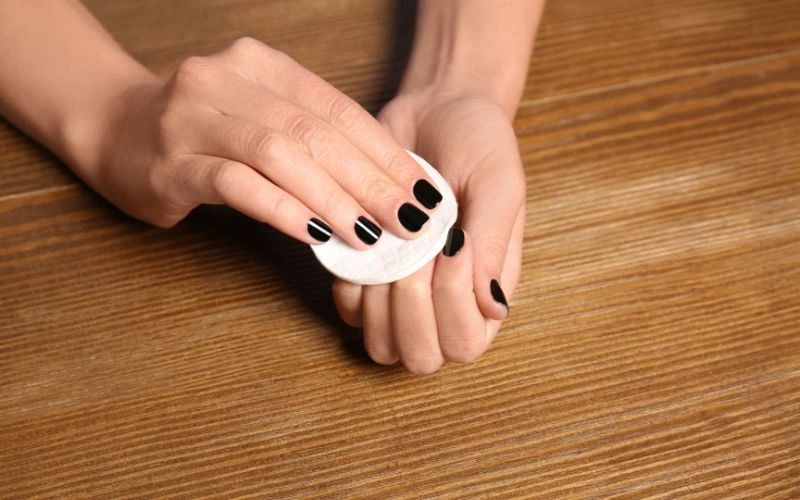
One of the easiest ways to remove butterfly nail art is by using acetone. Acetone is a common ingredient found in nail polish removers and is highly effective in breaking down the polish. Soak a cotton ball in acetone and gently rub it over the butterfly nail art. The acetone will dissolve the polish, making it easy to remove. Remember to moisturize your nails after using acetone, as it can dry.
Another method to remove butterfly nail art is using a nail polish remover with a built-in scraper. These removers have a small scraper attached to the cap, which can help lift off the nail art without damaging the nails. Apply the remover to the nail art and use the scraper to lift it off gently. Be careful not to scrape too hard, as this can cause damage to your nails.
If you prefer a more natural approach, try using warm soapy water. Fill a bowl with warm water and add a few drops of mild soap. Soak your nails in the soapy water for a few minutes to soften the nail art. Then, gently lift off the butterfly design with a soft brush or a toothpick. This method may take more time and effort, but it is gentle on your nails.
Removing butterfly nail art can be done without damaging your nails. Be gentle and take your time, whether you choose to use acetone, a nail polish remover with a scraper, or warm, soapy water. By following these methods, you can enjoy beautiful butterfly nail art while keeping your nails healthy and intact.
Are There Any Precautions or Safety Measures for Butterfly Nail Art?
Butterfly nail art has recently become increasingly popular, with many embracing the delicate and whimsical designs. However, it is important to remember that certain precautions and safety measures should be taken when indulging in this trend.
One of the main precautions to consider is using quality nail products. Choosing nail polishes, glitters, and other safe materials for use on the nails is essential. Low-quality products may contain harmful chemicals that can cause damage to the nails and skin. Look for products that are labeled as non-toxic and free from harmful ingredients.
Another important safety measure is to ensure proper nail care and hygiene. Before applying any nail art, ensure your nails are clean and free from infections or conditions. Regularly trim and shape your nails to prevent them from becoming too long or prone to breakage. Additionally, avoid sharing nail tools with others to prevent the spread of bacteria or infections.
Regarding butterfly nail art, it is crucial to be cautious when using nail embellishments. While they can add a beautiful touch to your design, they pose a choking hazard, especially for young children. If you have small children or pets at home, it is advisable to avoid using loose nail decorations or opt for larger, more secure embellishments.
Lastly, it is important to be mindful of any allergies or sensitivities. Some people may experience allergic reactions to certain nail products or materials. If you notice any redness, itching, or swelling after applying butterfly nail art, remove it immediately and consult a dermatologist if necessary.
While butterfly nail art can be a fun and creative way to express yourself, taking precautions and safety measures is essential. You can enjoy beautiful butterfly nails without compromising your health and safety by using quality products, practicing good nail hygiene, being cautious with embellishments, and being mindful of allergies.
Conclusion
In conclusion, butterfly nail art is a popular trend that allows individuals to express their creativity and add a touch of whimsy to their nails. Throughout this post, we have explored various aspects of butterfly nail art, including popular designs, creating them, the tools and materials needed, tips for achieving a perfect look, and even the removal process.
One of the key takeaways from this post is the wide range of butterfly nail art designs available. From intricate and realistic designs to simpler, more abstract ones, there is something to suit every individual’s style and preference. One can create unique and eye-catching butterfly nail art by experimenting with different colors, shapes, and techniques.
Creating butterfly nail art requires basic tools and materials such as nail polish, brushes, and nail art decorations. These can easily be found at beauty supply stores or online. With a little practice and patience, anyone can master the art of butterfly nail design.
To achieve a perfect butterfly nail art look, following some tips and tricks is important. These include starting with a clean and well-prepped nail surface, using thin layers of polish for better control, and adding details with precision using fine brushes. Additionally, practicing on nail art wheels or fake nails can help improve skills before attempting the design on natural nails.
The time required to create butterfly nail art varies depending on the complexity of the design and the individual’s skill level. However, with practice, one can become more efficient and create stunning designs in less time.
Butterfly nail art can be done on natural nails, allowing individuals to showcase their creativity without artificial nails. However, it is important to take precautions and avoid using harsh chemicals that may damage the nails. Removing butterfly nail art can be done gently using nail polish remover and a cotton pad, taking care not to scrape or damage the nails.
As for future developments and trends, we expect to see more innovative techniques and designs in butterfly nail art. With the growing popularity of nail art, new tools, and materials will likely be introduced to make the process even more accessible and enjoyable.
Thank you for taking the time to read this post on butterfly nail art. We hope you found it informative and inspiring. If you have any comments, questions, or feedback, please leave them below. Happy nail art-ing!

