

Applying chrome nails at home can seem challenging, but with a few essential tips, you’ll get a salon-quality finish. Start by ensuring your nails are clean, dry, and properly shaped. A thin layer of gel base coat is vital, curing it under a UV or LED lamp. A sponge applicator helps achieve a smooth, even coat for chrome powder. Sealing with a top coat is essential for longevity, but there’s more to it than just these basics. You might wonder about the finer details that elevate your at-home manicure.
Key Takeaways
- Meticulously prep nails by cleaning and buffing them to ensure a smooth surface for the chrome powder.
- Apply a high-quality gel base coat and cure under a UV or LED lamp for a strong foundation.
- Gently rub chrome powder onto the cured gel nails using a sponge applicator for an even and mirror-like finish.
- Seal with a top coat and cure again under a UV or LED lamp to protect the chrome layer and enhance longevity.
- Pay attention to nail edges during each step to prevent chipping and ensure a long-lasting manicure.
Overview of Chrome Nails
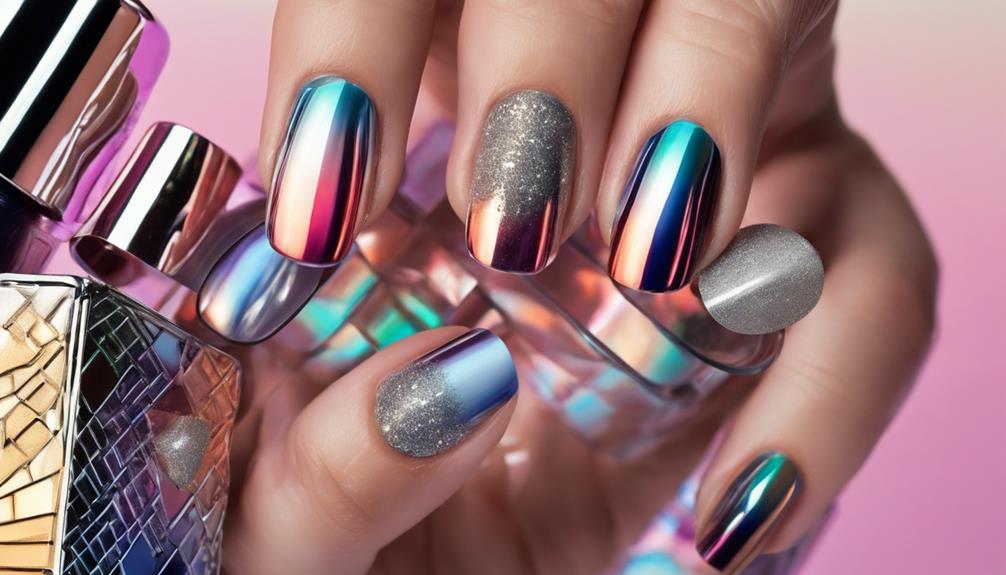
Chrome nails have taken the beauty world by storm, offering a futuristic and shiny look perfect for concerts and festivals. This unique twist on traditional manicures isn’t only trendy and achievable at home with the right tools and techniques. You’ll love how versatile and eye-catching chrome nails are, especially with their holographic and pearl-like appearance.
To get started, you’ll need chrome powder, a gel base coat, and a sponge applicator.
Begin by applying the gel base coat to your nails. Cure it under a UV or LED lamp as directed to ensure a smooth and solid foundation.
Once the base coat is ready, it’s time to apply the chrome powder. Using the sponge applicator, gently rub the chrome powder onto your nails. The trick is to use light, circular motions to spread the powder evenly across the nail surface.
After achieving the desired chrome effect, seal your nails with a top coat and cure it again. The result is a flawless, mirror-like finish that lasts.
With these steps, you can easily achieve stunning chrome nails at home.
Celebrity Chrome Nail Trends
When you think of chrome nails, Hailey Bieber‘s name probably comes to mind. She popularized the trend with her holographic, pearl-like manicures.
Celebrities like Kylie Jenner and Gigi Hadid have also jumped on the bandwagon, showcasing their stunning chrome nails on social media.
This shiny, iridescent manicure is a favorite among stars. It is perfect for making a statement at concerts or festivals or elevating your everyday look.
Hailey Bieber Influence
Over the past few years, Hailey Bieber has played a pivotal role in catapulting chrome nails into the mainstream. Her penchant for this futuristic, holographic style has made it a staple in the world of beauty. When you think of Hailey Bieber’s nails, you envision a sleek, pearl-like finish that stands out in any crowd. Nail technicians even recognize this trend, attributing its popularity to her influence.
The allure of chrome nails lies in their unique, shiny finish, making them perfect for special events or elevating your everyday manicure. Hailey’s impact can be seen in how many celebrities, like Kylie Jenner and Gigi Hadid, have embraced this style, further cementing its place in pop culture.
Consider these highlights of Hailey Bieber’s chrome nail influence:
- Distinctive Style: Recognizable and often referred to by nail technicians as “Hailey Bieber nails.”
- Holographic Finish: A shiny, pearl-like appearance that adds a futuristic touch.
- Celebrity Endorsement: Other celebs like Kylie Jenner and Gigi Hadid have followed suit.
- Event-Ready: Ideal for concerts, festivals, and other special occasions.
- Trendsetter: Made chrome nails a mainstream beauty choice.
Popular Celebrity Styles
Building on Hailey Bieber‘s influential take on chrome nails, other celebrities have quickly embraced this eye-catching trend, making it a staple in Hollywood fashion. Hailey Bieber’s nails, known for their distinct holographic and pearl-like appearance, have set the tone for what’s hot in nail art. Celebrities like Kylie Jenner and Gigi Hadid often flaunt chrome manicures, turning this look into a popular trend.
When you think of celebrity styles, chrome nails top the list for their iridescent and futuristic appeal. Whether for a red carpet event or a casual outing, these nails add a unique flair that’s hard to miss. Nail technicians often get requests for “Hailey Bieber nails,” emphasizing the trend’s widespread popularity.
Chrome Nail Application isn’t only for the stars; with the right tools and techniques, you can achieve this glam look at home.
A gel manicure paired with chrome powder can replicate the celebrity styles you admire. Perfect for concerts and festivals, chrome nails are a versatile choice that elevates any outfit. So, if you want to switch up your manicure game, chrome nails are the way to go.
Essential Tools for Application
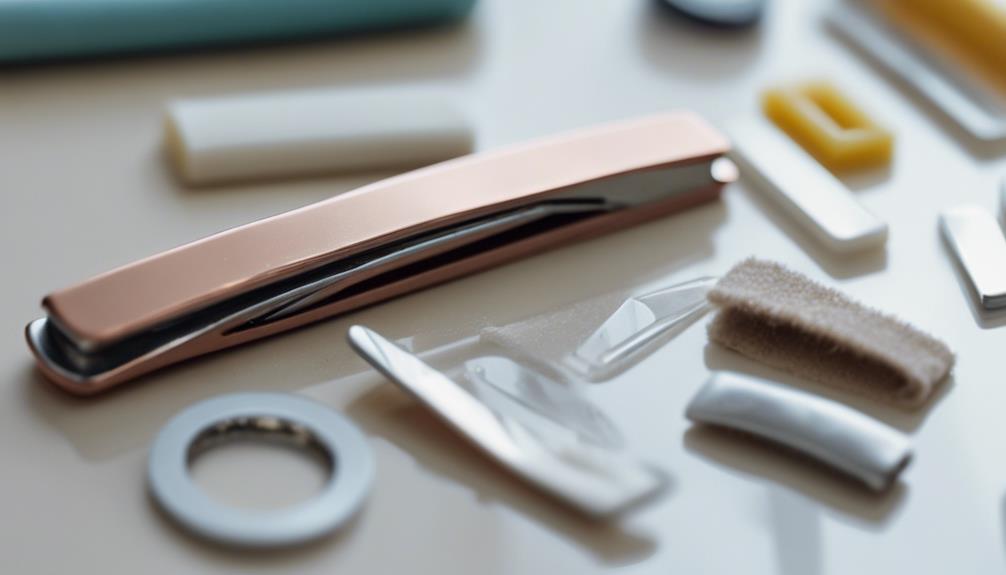
Having the right tools is necessary to accomplish stunning chrome nails at home. Using the proper tools guarantees a smooth application process and long-lasting results for your chrome nails. Here are the must-have items you’ll need for a perfect DIY chrome manicure:
- Nail file: Prepping your nails with a good file helps create a smooth base for your gel polish.
- The gel base coat and top coat are essential for anchoring the chrome powder and sealing your manicure.
- UV or LED lamp: Vital for curing each layer of gel nail polish and chrome powder.
- Chrome powder: This is the show’s star, giving your nails that mesmerizing metallic finish.
- Sponge applicator: A sponge or makeup applicator is perfect for evenly applying the chrome powder to your nails.
Besides these, having a fluffy brush to dust off excess powder and paper towels to clean up any mess guarantees a flawless chrome finish. Investing in quality products and tools can make a significant difference in the outcome of your at-home chrome nail application. With these essentials, you’re ready to create dazzling, salon-quality chrome nails right from the comfort of your home.
Step-by-Step Application
Now that you’ve gathered your essential tools, let’s walk through the detailed application process.
Start by preparing your nails with a base coat and gel polish and curing them under a UV lamp.
Next, apply the chrome powder with a sponge applicator, seal it with a gel top coat, and cure again for a stunning finish.
Essential Tools Needed
When you’re getting ready to apply chrome nails at home, having the right tools is crucial for achieving a salon-quality finish. The process is straightforward, but using the correct equipment will significantly affect the final look. Here’s a quick rundown of the essential tools you’ll need:
- Nail file and buffer: Start by preparing your nails. Wash, clip, file, and buff them to create a smooth surface for the Chrome application.
- Gel base coat: Apply this first and cure it under a UV or LED lamp. This guarantees the chrome powder adheres properly.
- Gel polish: Apply your desired color after the base coat is cured.
- Chrome powder: Rub this onto your nails using a sponge eyeshadow applicator until you achieve a shiny, reflective finish.
- Top coat: Seal the chrome powder with a top coat and cure it again to lock in the shine.
You’ll also need a fluffy brush to dust off any excess powder. By having these tools ready, you’re setting the stage for a flawless chrome manicure that looks like it came straight from the salon.
Detailed Application Process
With your essential tools ready, let’s walk through the step-by-step application process for achieving stunning chrome nails at home.
Start by applying a gel base coat to your clean nails. Cure the base coat under a UV or LED lamp for 30 seconds to confirm it’s set.
Next, choose a dark or light gel polish color. Apply the first coat and cure it under the UV or LED lamp for the recommended time. If necessary, apply a second coat for full coverage and confirm it again.
Once your base color is cured, it’s time to add the chrome effect. Gently rub the Chrome Powder onto your nails using a sponge applicator. Make sure to cover the entire nail surface for a shiny finish. Brush off any excess powder to avoid a messy look.
To seal the chrome powder, apply a gel top coat over each nail, covering the edges to prevent chipping. Cure the top coat under a UV or LED lamp until it’s completely confirmed. This step confirms that your chrome nails are durable and long-lasting. Now, admire your beautifully done chrome nails!
Design Ideas for Inspiration
Celebrities’ stunning chrome manicures are a treasure trove of inspiration for your next nail design. Whether aiming for a chic, sophisticated look or a trendy twist, chrome nails offer endless possibilities. Plunge into design ideas by looking at celebrity inspiration from stars like Hailey Bieber and Kylie Jenner, who often showcase unique styles.
To get you started, here are a few ideas:
- Holographic Pink: A shiny, iridescent pink that adds a glamorous touch to any outfit.
- Gold Gem Accents: Incorporate tiny gold gems on a nude base for a chic yet striking appearance.
- Chrome Leopard Print: Combine the wild pattern of leopard print with the futuristic shine of chrome for a bold, trendy twist.
- Baby Blue with Chrome Tips: Soft blue nails with reflective chrome tips offer a subtle yet eye-catching design.
- Champagne Gold Chrome: Opt for a sophisticated, muted gold perfect for any occasion.
Experiment with these chrome nail designs to find what suits your style. There shiny, futuristic finish makes them perfect for concerts, festivals, or simply adding a standout touch to your everyday look.
Removing Chrome Powder
Removing chrome powder from your nails can be straightforward if you follow a few important steps.
First, gently buff your nails to eliminate the chrome powder layer and reveal the original gel polish color underneath. Using a soft buffer, lightly go over the surface of each nail. This process helps avoid damaging the gel manicure beneath the chrome layer.
Next, file away the gel top coat and chrome powder layer carefully. Doing this gently is vital to maintain the integrity of your gel polish. Avoid using acetone during this process, as it can harm the gel manicure and dry out your nails. Instead, focus on patience, steady filing, and buffing.
Once the chrome powder is completely removed, wash your hands to eliminate dust or residue. This step guarantees that your nails are clean and ready for the next phase of care.
Apply cuticle oil generously around your nails to keep your cuticles moisturized and healthy. Finally, moisturize your hands to maintain overall skin and nail health.
Complete Manicure Removal
When removing your complete chrome manicure, carefully file or drill off the chrome powder layer. This step helps break down the top layer, making it easier for the acetone to penetrate and dissolve the polish underneath.
Next, soak the cotton balls in acetone and place them on your nails. Wrap small pieces of aluminum foil around each fingertip, securing the cotton balls in place. This creates a mini “soak-off” environment that helps the acetone work more effectively. Leave the wraps on for about 10-15 minutes.
After the wait, gently remove the aluminum foil and cotton balls. The polish should come off easily. If any residue remains, use a fresh cotton ball soaked in acetone to wipe it away. Be gentle to avoid damaging your natural nails.
To complete your manicure removal process, wash your hands thoroughly to remove any acetone residue. Apply cuticle oil to nourish your nail beds and finish with a good moisturizer to keep your skin hydrated.
Here’s a quick rundown:
- File or drill off the chrome powder layer.
- Soak cotton balls in acetone.
- Wrap nails in aluminum foil for 10-15 minutes.
- Remove foil and cotton balls; clean off polish.
- Finish by washing hands, applying cuticle oil, and moisturizing.
Tips for Long-Lasting Chrome
To achieve long-lasting chrome nails, start by meticulously prepping your nails. Begin with a clean, dry surface by removing old polish and pushing back your cuticles. This step guarantees the chrome powder adheres properly, giving you that stunning mirror-like finish.
Next, apply a high-quality base coat. This not only safeguards your natural nails but also provides a smooth canvas for your gel nails. Once the base coat is cured, apply a layer of gel polish. Cure it under a UV or LED lamp before applying a second coat for added durability.
Now comes the fun part: the chrome powder. Using an applicator, gently rub the powder onto your gel nails. Cover the entire nail evenly to achieve that sleek, reflective look.
After you’ve applied the chrome powder, seal it with a top coat. Don’t forget to seal the edges of your nails to prevent chipping.
Conclusion
You’ve got everything you need to achieve stunning chrome nails at home. By following these steps and using the right tools, you can rock a flawless manicure that lasts. Remember to prep your nails properly, apply your products carefully, and seal everything for a long-lasting finish. With some practice, you’ll master the chrome look and turn heads with your dazzling nails. Happy polishing!
FAQs
1. How to Do Chrome Nails at Home?
To do chrome nails at home, start with nail prep. Apply a base coat, cure under a UV lamp, then use the rubbing technique to apply chrome powder. Finish with a top coat for a shiny, futuristic look.
2. How Do You Get the Chrome Look on Your Nails?
To get the chrome look on your nails, choose colors you love. Nail prep is essential, so clean and buff your nails. Use a consistent application technique with chrome powder, seal with a top coat, and follow maintenance tips.
3. How Do You Get Chrome to Stay on Your Nails?
To guarantee chrome stays on your nails, follow these longevity tips: Proper prep is essential. Use a quality top coat, avoid chipping by steering clear of harsh chemicals, and maintain a routine of moisturizing cuticles and touching up chips.
4. How to Apply Chrome Step by Step?
To achieve a chrome manicure, start with nail prep. Apply a base coat and cure it. Add gel polish, cure it, and then start rubbing powder onto it. Finish by sealing with a topcoat and curing for a shiny finish.

